
Why Preparing for Starlink Installation Makes All the Difference
Preparing for starlink installation is the key to getting fast, reliable satellite internet from day one. The difference between a frustrating setup and a seamless one comes down to planning. Proper preparation means finding the best location for your dish, selecting a sturdy mount, and planning your cable route before your kit even arrives.
Skipping these steps, especially the obstruction check or using the temporary kickstand on a windy rural property, can lead to dropouts and poor speeds. Investing an hour or two upfront to test locations and secure a proper mount means you'll enjoy uninterrupted connectivity from the moment you go live.
I'm Aaron Wroblewski, founder of SpaceTek Australia. With over 25 years of experience helping Australians in remote environments, I started SpaceTek to address a major gap in the market: poorly designed satellite mounts that fail in harsh Australian conditions. We create rugged, easy-to-install solutions that are built to last.
Australia's environment is uniquely demanding. From the cyclonic winds in the north to the corrosive salt-laden air along our vast coastline and the intense UV radiation of the outback, standard hardware often doesn't stand a chance. We saw countless installations fail due to rust, wind fatigue, and material degradation. That's why SpaceTek was born—to engineer mounting solutions specifically for these challenges, ensuring your investment in high-speed internet is protected for the long haul.
The Ultimate Guide to Preparing for Starlink Installation
Getting Starlink up and running in rural or remote Australia is a game-changer. But your experience depends entirely on how well you prepare. Let's walk through the essential steps for a successful installation.
Step 1: Finding the Perfect Spot for Your Dish
The most critical factor for Starlink performance is giving your dish ("Dishy") a completely clear view of the sky. Even small obstructions like tree branches or chimneys can cause frustrating dropouts.
Your best tool is the Starlink app, which has a "Check for Obstructions" feature. Download it for iOS or Android before your kit arrives. Use it to scan potential locations for a 110-degree cone of clear sky. Be mindful of trees (which grow and get leaves seasonally), buildings, and other tall structures. If you can't find a clear spot at ground level, you'll need to go higher with a roof, wall, or pole mount.
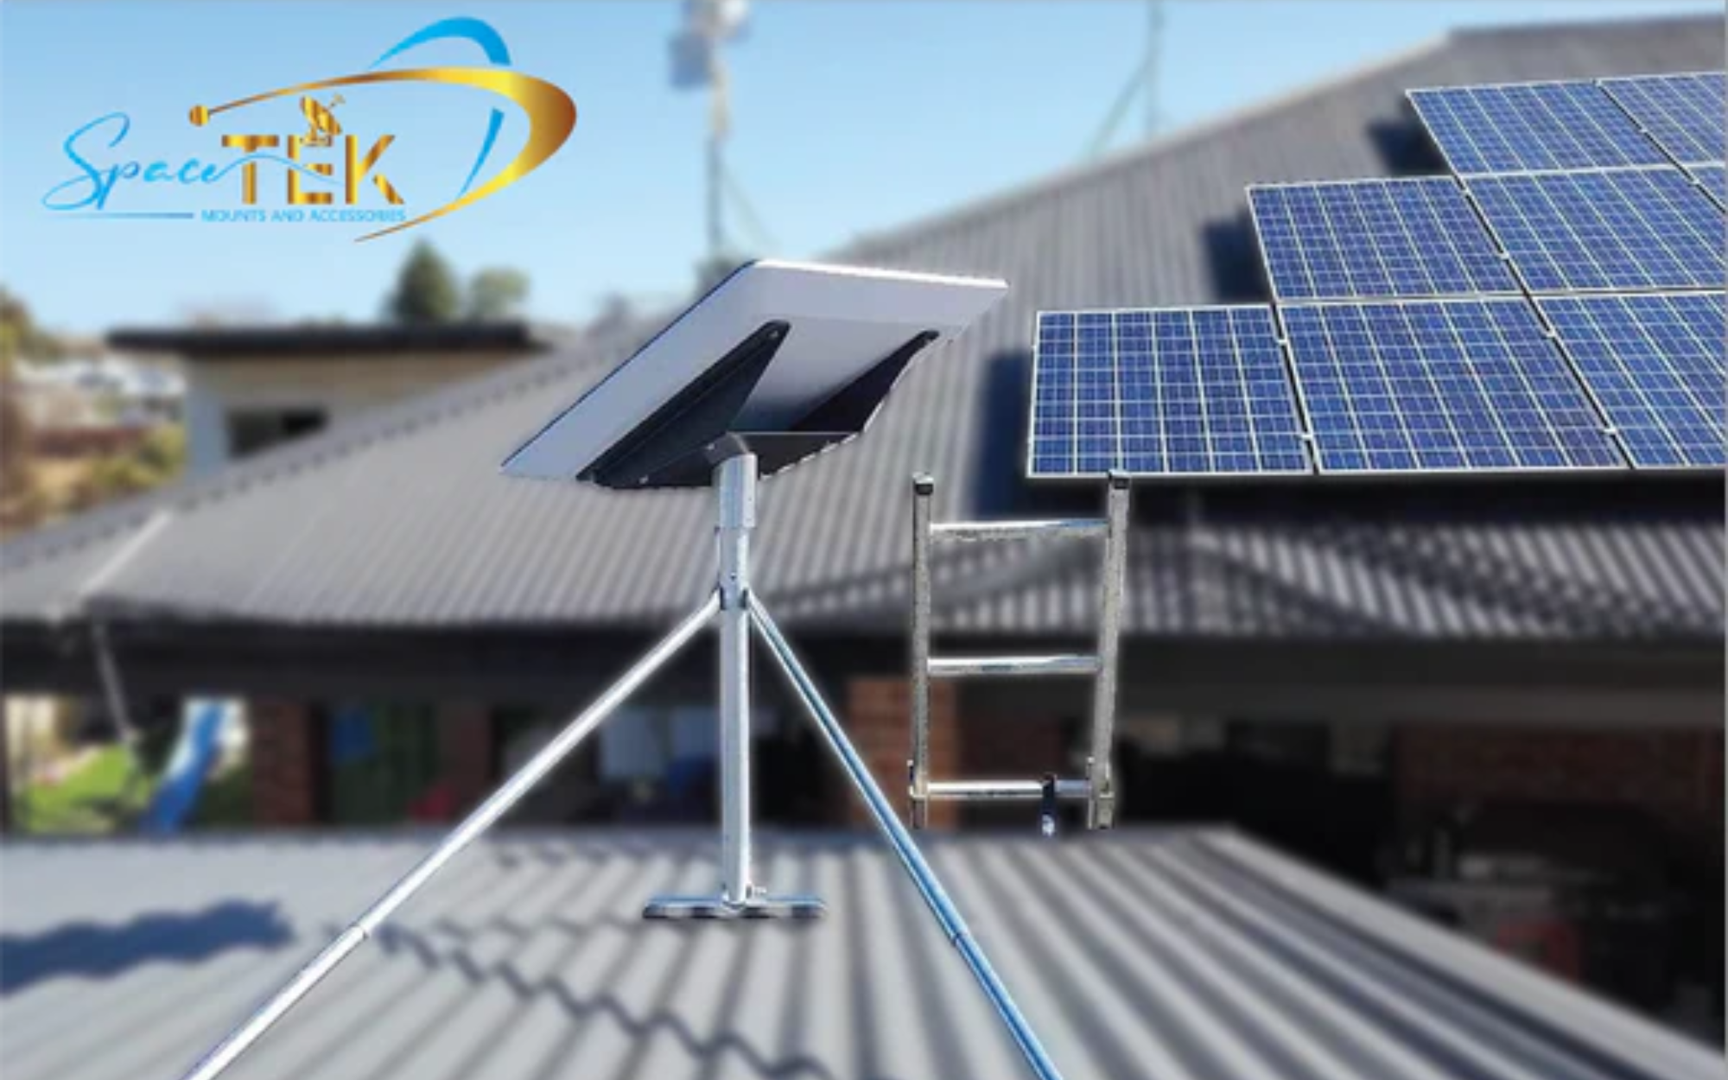
Step 2: Choosing the Right Mount When Preparing for Starlink Installation
Once you've found your spot, selecting the right mount is the next crucial step in preparing for starlink installation. The included kickstand is only for temporary setup and isn't built for Australia's challenging weather.

A permanent mount provides superior stability, better obstruction clearance, and weather resistance. At SpaceTek Australia, we engineer our mounts with rust-resistant aluminium and stainless steel to handle everything from coastal salt spray to outback dust. Unlike generic mounts made from powder-coated or galvanized steel that can quickly rust and fail, our use of marine-grade materials guarantees longevity and performance, saving you from future replacements and service interruptions.
| Feature | Included Kickstand | Permanent Mount |
|---|---|---|
| Stability | Minimal; easily knocked over by wind. | High; securely fastened for maximum stability in Australian winds. |
| Obstruction Clearance | Limited to ground level. | Excellent; lifts the dish above trees, fences, and rooflines. |
| Weather Resistance | Poor; exposes components to elements. | Superior; designed to be sealed against water and withstand UV and salt spray. |
| Long-Term Performance | Prone to interruptions and damage. | Optimal; provides a consistent signal and protects your hardware. |
The right mount depends on your situation. Roof mounts are often the best choice for clearing trees and neighbouring structures. Our designs cater to various Australian roof types, including corrugated tin and tile, ensuring a secure and weatherproof seal. Wall mounts are an excellent alternative if a gable end or tall exterior wall offers an unobstructed view, and they must be fastened securely to wall studs or masonry. For properties with dense tree cover, Pole mounts provide the ultimate solution, allowing you to elevate the dish high above the canopy for a perfectly clear line of sight.
- For the rectangular dish, check out our Gen 2 Mounts.
- For the newer standard dish, explore our Gen 3/V4 Mounts and Accessories.
- For portable use, our Starlink Mini Mounts offer stable, temporary solutions.
- For life on the road, our RV and Portability Mounts are designed to handle constant vibration.
Step 3: Tools and Cable Routing for Preparing for Starlink Installation
Now it's time to plan your cable route. A neat, professional setup starts with good planning.
You'll need basic tools like a drill, level, socket wrench, and silicone sealant for weatherproofing. The standard Starlink cable is 15m long (longer options are available), so plan your route from the dish to your router. For permanent installation, you'll need to drill through an exterior wall. It's essential to seal any holes with silicone to prevent water and pests from getting in. For a clean, professional entry point, consider our Waterproof bulkhead connectors.
If you're running the cable underground, it must be placed inside a PVC conduit (19mm is suitable) buried at least 45-60cm deep to protect it.
Step 4: Special Considerations for Challenging Environments
Australia's environment demands robust hardware. Preparing for starlink installation means planning for high winds, coastal salt spray, and extreme temperatures.
A flimsy mount won't survive strong winds. Our SpaceTek mounts are engineered for stability and should be secured to structural beams. For coastal areas, salt spray corrodes standard metals quickly. That's why we exclusively use marine-grade aluminium and stainless steel. For mobile setups on RVs or 4WDs, constant vibration requires specialised solutions like our Heavy-duty mobility mounts to ensure a reliable connection on the move.

Finalising Your Setup and Getting Online
You've done the hard work—your dish is mounted and cables are routed. Now for the exciting part: getting online.
Activating Your Service and Setting Up Wi-Fi
The activation process is surprisingly straightforward.
- Power Up: Connect the cable to the dish and router, then plug the router into a power source. The dish will automatically move to find satellites.
- Connect to Wi-Fi: Use your phone to connect to the default "STARLINK" network.
- Customise Your Network: The Starlink app will guide you through setting a new network name (SSID) and a strong password.
Your speeds may not be at their peak immediately, as the system can take up to 12 hours to download updates and calibrate. For kit-specific instructions, refer to Starlink's official setup guides.
Power and Advanced Setups
Starlink typically uses 50-75 watts. For mobile use in an RV or caravan, managing power is critical. Running the standard setup through an inverter to convert your 12V battery power to 240V AC, only for the Starlink power supply to convert it back down to DC, can waste up to 30% of your energy. To avoid draining your battery, a dedicated DC power solution is essential. Our Starpower 12V Starlink DC Power Supply and Starpower V4 Ultimate Power Solution are highly efficient options that bypass the power-hungry inverter, saving precious battery life for off-grid adventures.
If you prefer to use your own router for better coverage or advanced features, an Ethernet adapter is required to create a wired connection. Once connected, you can integrate your preferred third-party router. To maintain access to the Starlink app's diagnostic tools with this setup, you may need to configure a static route in your router's settings (Network: 192.168.100.0, Gateway: 192.168.100.1).
Troubleshooting and Long-Term Maintenance
Even with careful preparing for starlink installation, you might face occasional issues. The Starlink app is your best friend for diagnostics.
When Things Go Wrong
If you experience slow speeds or dropouts, obstructions are the most common culprit. Trees grow and seasonal foliage can create new blockages, so re-run the "Check for Obstructions" tool in the app periodically.
If the app shows a "Disconnected" message, check that all cables are securely plugged in. If there's no Wi-Fi signal, check the light on your router—a solid white light means you're online, while red means it can't connect. Often, the simplest fix is to power cycle the system by unplugging it for 30 seconds. For more complex issues, Starlink's troubleshooting offline issues guide can help.
Keeping Your System Running Smoothly
Long-term performance relies on good maintenance.
- Inspect Your Mount: Periodically check your permanent mount for any loosening, especially after severe weather. While cheaper mounts may require frequent re-tightening or rust treatment, our robust, rust-proof mounts are engineered for a 'set and forget' experience, providing lasting peace of mind.
- Check Your Cables: Ensure cables are free from damage and that all weatherproofing seals, like our bulkhead connectors, are intact and secure.
- Keep it Clean: Gently clean dust, dirt, or bird droppings off the dish to maintain peak performance.
The importance of correct installation cannot be overstated. Every step, from site selection to choosing a robust, weather-resistant mount, contributes to a stable, reliable internet connection.
At SpaceTek Australia, we are passionate about providing the most secure, rust-resistant, and user-friendly Starlink mounts in Australia. Our solutions are built specifically for Australian conditions. We've spent years refining our designs because your internet connection should be something you can rely on, not worry about.
If you have any questions about selecting the perfect mount or optimising your setup, we're here to help. Please don't hesitate to contact us for expert advice.

Leave a comment
This site is protected by hCaptcha and the hCaptcha Privacy Policy and Terms of Service apply.