What Is a Starlink Gable Mount and Which One Do You Need?

A Starlink gable mount is a mounting solution that positions your Starlink dish on or near the triangular gable end of your roof, giving it maximum sky clearance and a strong, elevated signal position.
Here are the main types available:
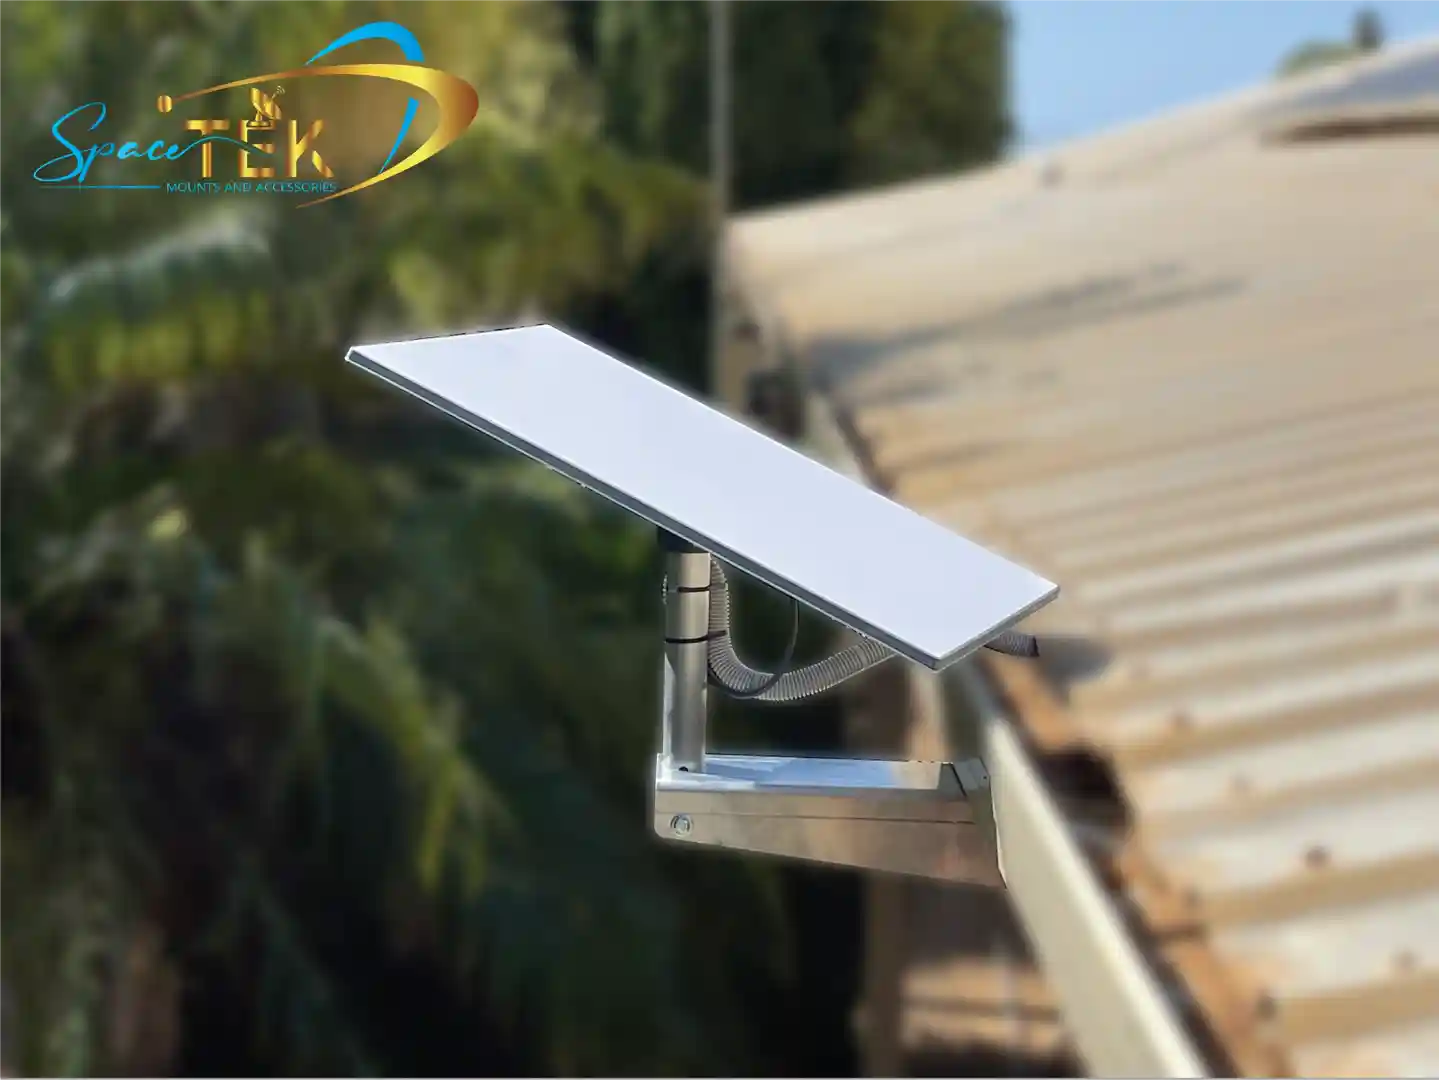
- Standard Wall Mount — bolts to the exterior wall near the gable or fascia; accommodates up to a 4-inch overhang
- Ridgeline Mount (non-penetrating) — sits on the roof ridge without drilling; held in place by ballast weights; rated for wind up to 80 kph and roof slopes under 45 degrees
- Fascia/Offset Mounts — attach to the fascia board at the roof edge; ideal where wall access is limited
- Third-party custom mounts — aluminium or ASA plastic options built for specific Starlink generations (Gen 2 and Gen 3 V4/UTA-232)
The right choice depends on your roof type, slope, Starlink kit version, and whether you want to drill or not.
Getting your dish up high and clear of obstructions isn't just a nice-to-have — it's essential for reliable satellite tracking as Starlink's low-earth orbit satellites move overhead.
Many Australian homes, especially in rural and regional areas, have steep-pitched roofs, wide overhangs, or corrugated tin that make standard mounting tricky. That's where knowing your gable mount options really matters.
Introduction to Starlink Gable Mount Solutions
When we talk about a Starlink gable mount, we are looking at the most strategic real estate on your home. The gable—the triangular portion of a wall between the edges of intersecting roof pitches—is often the highest point of the structure. Mounting here provides superior sky visibility, which is critical because your Starlink dish needs to track low Earth orbit satellites moving rapidly across the horizon.
In Australia, environmental factors play a huge role. From the scorching sun in the Outback to the salty air along the coast, a mount must be more than just a bracket; it needs to be a durable foundation. Using the Starlink app's obstruction tool is your first step. It helps you identify if the fascia positioning or the apex of the gable offers the clearest path. By elevating the dish, you significantly reduce the risk of signal drops caused by nearby trees or neighbouring structures.

Selecting the Right Starlink Gable Mount for Your Roof
Choosing the right hardware involves checking your roof's "vital signs": overhang depth, slope angle, and material. For example, a standard wall mount is fantastic but usually limited to a 4-inch (approx. 100mm) overhang. If your eaves are deeper, you’ll need an offset or extended arm to ensure the dish clears the gutter line.
Structural integrity is paramount. Whether you are using a penetrating mount that screws into the timber or a non-penetrating version, the mount must handle the "sail effect" created by high winds. Most quality ridgeline mounts are rated for wind speeds up to 80 kph, provided they are weighted correctly. For more details on these specific setups, check out our starlink-ridgeline-roof-mount-guide.
Comparing Penetrating and Non-Penetrating Starlink Gable Mount Options
The debate between penetrating and non-penetrating mounts often comes down to your roof material.
- Penetrating Mounts: These include fascia and wall-eave mounts. They are permanent, highly secure, and involve drilling into structural beams. They are the go-to for corrugated tin roofs common in Australia.
- Non-Penetrating (Ridgeline) Mounts: These sit across the peak of the gable. They use ballast—typically concrete blocks or heavy bricks—to stay in place. These are perfect for renters or those concerned about roof leaks. A typical Gen 3 non-penetrating mount might require four large concrete blocks to meet safety standards.
For a deeper dive into which style suits your home, see our starlink-roof-mounts-complete-guide.
Compatibility for Gen 3 V4 and Gen 2 Starlink Gable Mount Kits
Compatibility is the most common hurdle for DIY installers. The Gen 2 "Standard Actuated" dish (the one that moves itself) has a different mast diameter and connection point compared to the newer Gen 3 V4 (UTA-232) "Standard" dish (which is kickstand-based and stationary).
If you have the latest hardware, you’ll likely need a Gen 3 V4 mount or a specialised pipe adapter. These adapters allow the new dish to "click" into traditional mast pipes. For those still rocking the previous version, our Gen 2 accessories ensure you can still get a perfect fit on your gable.
Material Durability: Aluminium and UV Stability
In the harsh Australian climate, rust is the enemy. We prioritise full aluminium construction because it doesn't corrode like cheap steel. Furthermore, any plastic components—like cable clips or adapters—must be made from UV-stable materials like ASA or high-grade ABS.
Coastal installations are particularly demanding; salt spray can eat through standard hardware in months. By choosing rust-resistant mounts, you ensure that thermal expansion and contraction won't loosen your bolts over time, maintaining a rock-solid connection for years.
Installation Guide and Best Practices
Safety is the first priority. Before you climb a ladder, ensure you follow standard height safety practices and have the right tools: a 6mm drill bit for pilot holes, a 9/16 inch hex socket for lag screws, and a reliable level.
One of the biggest mistakes we see is "blind drilling." You must locate the structural beams or rafters behind the gable wall or fascia. Screwing into just the weatherboard or thin fascia tin will not hold up during a storm.
Step-by-Step Gable Installation and Tools
- Survey: Use the Starlink app to find the spot with zero obstructions.
- Marking: Hold the mount against the gable and mark the hole locations over a structural beam.
- Drilling: Drill 6mm pilot holes. This prevents the timber from splitting.
- Sealing: Apply a generous amount of silicone sealant into the holes and on the back of the mount.
- Fastening: Secure the mount using heavy-duty lag screws.
- Cabling: Route the cable, ensuring you leave a "drip loop" before the cable enters the house to prevent water from following the wire inside.
For a visual breakdown of this process, visit our guide on how to install a starlink roof mount.
Environmental Factors and Wind Load Considerations
A Starlink gable mount acts like a lever against your house. Even a moderate 80kph wind puts significant torque on the mounting base. On metal roofs, we recommend a 20-degree tilt for Gen 3 dishes to help with water run-off and to prevent debris build-up. In high-wind zones, consider additional tethering or using a mount with a wider base plate to distribute the load across multiple rafters.
Conclusion and Expert Support from SpaceTek Australia
Choosing the right Starlink gable mount is the difference between "it works sometimes" and "it works perfectly." By focusing on high-quality, rust-resistant materials and ensuring your mount is compatible with your specific Starlink generation, you protect both your investment and your home.
At SpaceTek Australia, we specialise in custom kits designed specifically for our unique environment. Our mounts are built to be user-friendly for the self-installer while providing the professional-grade reliability needed for the Australian bush, coast, and everywhere in between.
If you're unsure which bracket fits your roof or need advice on the best accessories for your setup, don't hesitate to contact us. Our team is ready to help you get the most out of your Starlink connection.


Leave a comment
This site is protected by hCaptcha and the hCaptcha Privacy Policy and Terms of Service apply.