Why Proper Mounting Matters for Your Starlink Gen 2 Setup

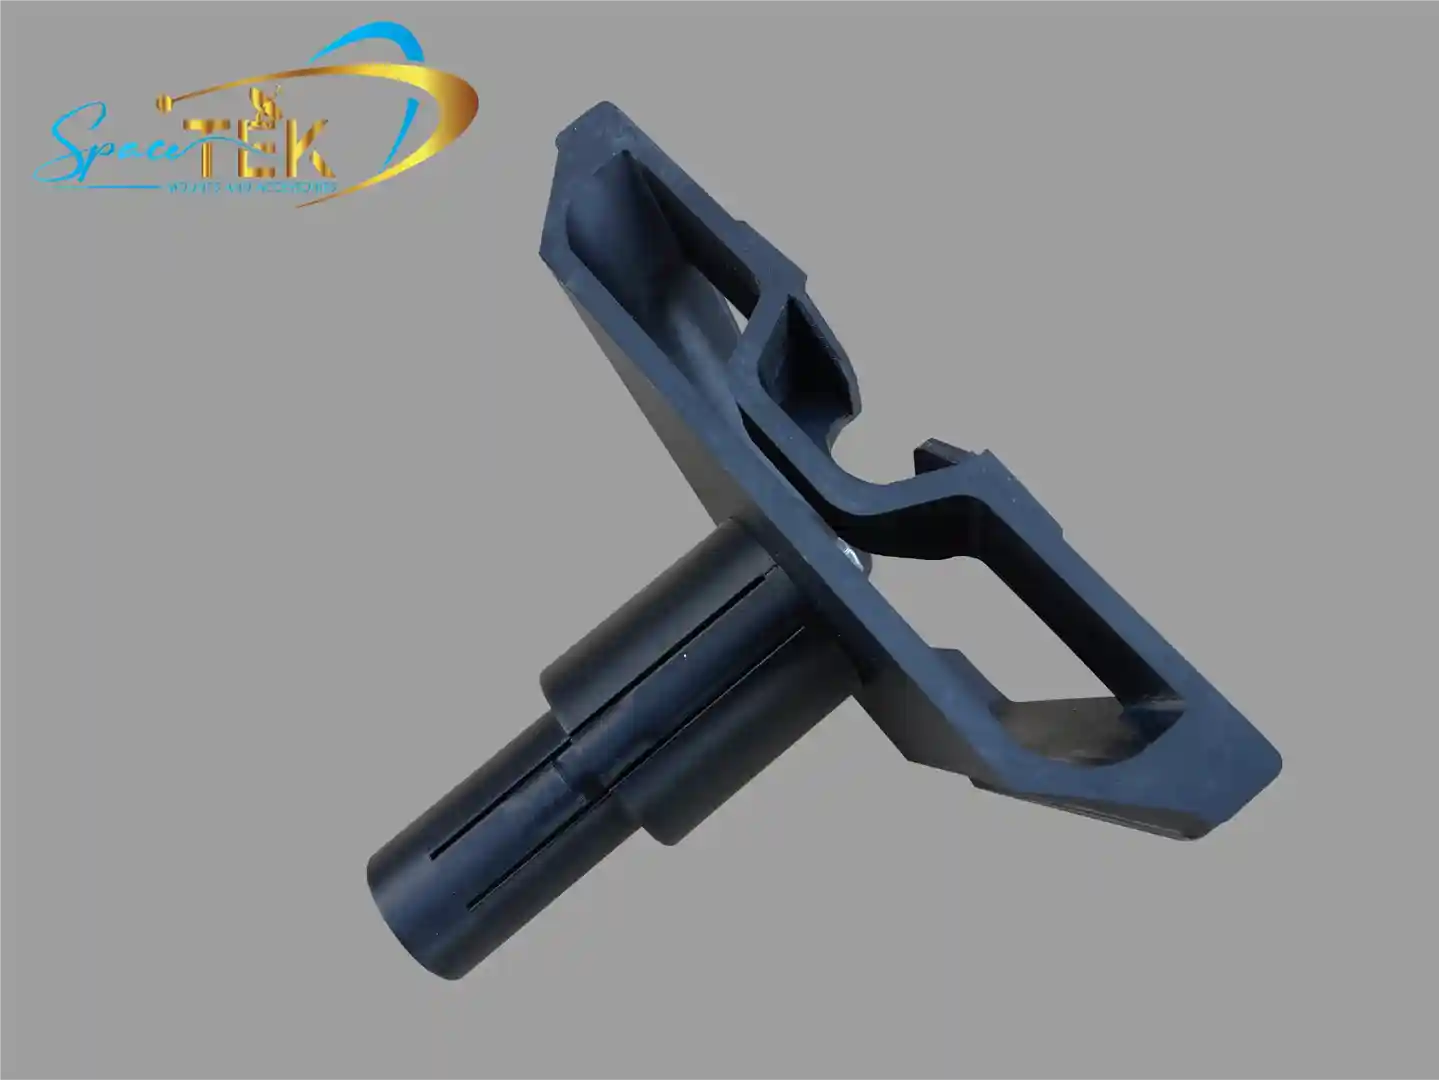
The Starlink Gen 2 pipe adapter is an essential mounting accessory designed to attach your rectangular Starlink dish to any existing metal pole. It fits poles between 31mm (1.25 inches) and 63.5mm (2.5 inches) in diameter and includes everything you need for installation: the pipe adapter mount, an Allen key, and 20 cable routing clips.
Key specifications at a glance:
- Compatible with: Starlink Standard Kit (rectangular Gen 2 dish)
- Pole diameter range: 31mm to 63.5mm (1.25" to 2.5")
- Materials: Weather-resistant construction
- Installation requirement: Must be mounted within 5 degrees of vertical
- Important: Only compatible with metal pipes—not PVC or plastic
- What's included: Pipe adapter mount, Allen key, 20x cable routing clips
Getting your Starlink dish mounted properly is more important than most people realise. Your dish needs a clear view of the sky to maintain connection with satellites as they move overhead. Any obstructions—trees, buildings, or even incorrect mounting angles—will cause service interruptions that make your internet unreliable.
The Gen 2 pipe adapter solves a common challenge for rural and remote installations. Instead of drilling into your roof or walls, you can attach your dish to an existing pole. This approach is faster, less invasive, and often more practical for properties with existing infrastructure like TV antenna masts or purpose-built satellite poles.
Australian conditions demand mounting solutions that can handle intense UV exposure, coastal salt spray, and unpredictable weather events. That's why choosing the right adapter and following proper installation guidelines matters so much for long-term reliability.
I'm Aaron Wroblewski, founder of SpaceTek Australia, and I've spent over 25 years working with satellite communications and remote connectivity solutions. Throughout my experience, I've seen how proper mounting hardware, including the right Starlink Gen 2 pipe adapter setup, makes the difference between reliable internet and constant frustration, especially in challenging Australian environments.
Simple guide to Starlink Gen 2 pipe adapter terms:
- Starlink Gen 1 vs Gen 2 vs Gen 3
- Starlink Standard vs High Performance
- Starlink Generations and Accessories
Understanding the Starlink Gen 2 pipe adapter and Compatibility

When we talk about the Starlink Gen 2 pipe adapter, we are specifically referring to the hardware designed for the "Standard Actuated" dish. This is the rectangular dish that many Australians received between 2021 and 2023. It is often called the V2 hardware. This adapter is a bridge between the unique Starlink post and standard mounting pipes used in the telecommunications industry.
One of the most frequent questions we get is whether this adapter works with older round dishes or the newer Gen 3 (V4) models. The answer is no. The Gen 2 system uses a specific "kickstand" style connector that clicks into place, which is fundamentally different from the Gen 1 circular post or the Gen 3 kickstand-less design. If you are unsure which version you have, you can check our guide on Starlink generations and accessories to identify your hardware.
For those planning their installation, it is critical to note that this adapter is only intended for use with metal pipes. We strongly advise against using PVC or plastic piping. Under the Australian sun, plastic pipes can become brittle and flex, which leads to signal dropouts or, worse, the dish falling during a windstorm. You can find more technical details in the official Starlink pipe adapter guide.
Technical Specifications for the Starlink Gen 2 pipe adapter
The Starlink Gen 2 pipe adapter is engineered to be versatile. It accommodates a minimum pole diameter of 31mm (1.25 inches) and a maximum of 63.5mm (2.5 inches). This range covers most common TV antenna masts and satellite poles found across Australia.
Inside the box, you will find:
- The Pipe Adapter Mount
- An Allen Key (hex key)
- 20x Cable Routing Clips
While the kit includes the basics, we recommend having a few extra tools on hand for a professional finish. You will need a drill with a 6.5mm bit if you are securing the pole to a structure, a pen for marking, and potentially a compass or the Starlink App to check for obstructions. For a deeper dive into which mounts work best for different scenarios, see our comprehensive guide to compatible Starlink mounts.
Step-by-Step Installation of the Starlink Gen 2 pipe adapter
Installing the Starlink Gen 2 pipe adapter is a straightforward process, but the order of operations matters. If you plug the cable in before routing it through the adapter, you’ll find yourself starting over!
- Check for Obstructions: Before you even pick up a tool, use the Starlink App. Stand where you plan to mount the pole and ensure you have a clear 360-degree view of the sky.
- Remove the Kickstand: On the back of your Gen 2 dish, squeeze the release tab on the base and pull the kickstand away.
- Route the Cable: Feed the Starlink cable through the pipe adapter mount from the bottom and out the top end.
- Connect the Dish: Plug the cable firmly into the dish. Ensure the face of the plug is flush with the surface to maintain weatherproofing.
- Attach the Adapter: Slide the adapter onto the dish post until you hear it click into place.
- Mount to Pole: Slide the adapter over your mounting pipe. Use the provided Allen key to tighten the screws. We suggest tightening them just enough to hold the dish while you perform final alignment.
- Align and Lock: Power on your Starlink. The dish will move to find satellites. If the app alerts you that alignment is required, rotate the adapter on the pole. Once perfect, tighten the screws fully.
Proper alignment is the "secret sauce" for high speeds. If you're struggling with signal drops, we have a detailed article on how a pipe adapter solves alignment problems.
Mounting Solutions for RV and Portable Use

For our "grey nomads" and off-road enthusiasts, the Starlink Gen 2 pipe adapter is often used for temporary setups. We see many customers mounting a short pole to the drawbar of a caravan or using a telescopic mast.
In these mobile scenarios, weight and durability are key. Some users opt for carbon fibre poles to keep the setup light. We also offer specialised RV and portability accessories that allow you to deploy your Gen 2 dish in minutes and pack it away just as quickly when it's time to hit the road.
Choosing the Right Mount for Australian Conditions
Australia has some of the harshest environmental conditions in the world. From the scorching heat of the Red Centre to the salt-heavy air of the Gold Coast, your mounting hardware needs to be built tough. At SpaceTek Australia, we specialise in aluminium construction because it offers the best balance of strength and rust resistance.
Standard steel mounts can begin to show "tea staining" or structural rust within months if you live near the ocean. Our mounts are designed to be a "set and forget" solution. When using the Starlink Gen 2 pipe adapter, ensure the pole it is attached to is equally weather-resistant.
Comparing Gen 2 vs Gen 3 Mounting Requirements
As Starlink evolves, so does the mounting hardware. The Gen 2 dish is "actuated," meaning it has internal motors that tilt the dish. The newer Gen 3 (V4) dish is "kickstand-only" and relies on the user to set the initial angle.
The Starlink Gen 2 pipe adapter uses a click-in latch, whereas Gen 3 adapters often involve a different sliding mechanism or a "Standard to Standard" adapter. If you are upgrading your hardware, it is important to know that your Gen 2 adapter will not fit a Gen 3 dish. We've put together a guide for Gen 2 vs Gen 3 mount upgraders to help you navigate these differences.
Safety Warnings and Maintenance Tips
Safety should always be your top priority. Here are our non-negotiable rules for a safe installation:
- Vertical Alignment: Your pole must be within 5 degrees of vertical. If it's tilted further, the dish motors may struggle, leading to a "Motors Stuck" alert.
- Tethering: In high-wind areas, we recommend tethering your mount. While the adapter is strong, unexpected gusts can put immense leverage on a single mounting point.
- Lightning Protection: If you are the highest point on your street, consider external lightning protection.
- Power Down: Always unplug your Starlink from the wall before handling the dish or the cable.
- PPE: Wear eye protection and gloves when drilling into masonry or metal.
Conclusion and Expert Support
A secure installation is the foundation of a great internet experience. Using a Starlink Gen 2 pipe adapter allows you to utilise existing infrastructure, but it must be done correctly to withstand the unique challenges of the Australian climate.
At SpaceTek Australia, we are committed to providing high-quality, rust-resistant, and user-friendly mounts that ensure your dish stays exactly where it belongs—pointing at the sky. Whether you are mounting on a tin roof in the suburbs or a caravan in the outback, we have the gear and the expertise to help you get connected.
If you have questions about which mount is right for your specific property or vehicle, please get in touch with us. Our team is always happy to provide expert advice to ensure your Starlink setup is rock solid.


Leave a comment
This site is protected by hCaptcha and the hCaptcha Privacy Policy and Terms of Service apply.