A Deep Dive into Mesh Routers for Starlink
Mesh routers for Starlink extend your WiFi coverage beyond what the standard Starlink router can provide, eliminating dead zones in larger homes or properties.
Quick Answer for Starlink Users:
- Starlink's Standard Router covers up to 2,000-2,500 sq ft depending on generation.
- When You Need a Mesh System: Homes over 2,000 sq ft, thick walls, multiple levels, or outdoor coverage needs.
- Official Starlink Mesh Nodes: Work with Gen 2, Gen 3, and Mini routers (not Gen 1), limited to 3 nodes maximum.
- Third-Party Options: Require a Starlink Ethernet Adapter (for Gen 2) but offer advanced features like WiFi 6/7 and better range.
- Key Setup Rule: Place nodes 1-2 rooms apart from the main router for optimal performance.
You've got Starlink beaming high-speed internet from space, but what happens when the WiFi can't reach the back bedroom or the workshop? That's where mesh routers come in. They create a single, unified network that blankets your entire property with reliable connectivity.
For rural and remote Australians, this is a common problem. Larger properties, thick walls, and metal roofs mean a single router—even Starlink's capable Gen 3 model—often isn't enough. A mesh system is the solution, either by adding official Starlink nodes or using a more powerful third-party system.
I'm Aaron Wroblewski, founder of SpaceTek Australia. With over 25 years of experience helping remote Australians stay connected, I've seen how a well-configured mesh network transforms a patchy Starlink connection into seamless, whole-home coverage.
Related content about mesh routers for Starlink:
When we talk about mesh routers for Starlink, we're discussing a system designed to spread your internet connection far and wide. Unlike a traditional router that broadcasts from one point, a mesh system uses multiple access points (nodes) that communicate with each other to create a single, unified network. This means you can walk from one end of your home to the other, or even out to the shed, without your device ever dropping its WiFi connection.
Why a Single Starlink Router Isn't Always Enough
Starlink delivers impressive high-speed internet, but its standard router often struggles with the unique challenges of Australian properties. Thick brick walls, multiple levels, and sprawling layouts can block WiFi signals, creating frustrating dead zones. A single router might cover your main living area, but the signal can vanish by the time it reaches a separate workshop or granny flat. This is where a mesh system becomes a necessity.
With a mesh system, you can:
- Eliminate WiFi Dead Zones: Place nodes strategically to cover weak spots.
- Enjoy Seamless Roaming: Your devices automatically connect to the strongest node as you move, so you never have to switch networks manually.
- Support Multiple Devices: Mesh systems handle many connections at once, ensuring stable performance for all your smart devices, phones, and cameras.
- Extend Coverage Outdoors: Get reliable internet to your patio, shed, or a nearby caravan.
For a deeper dive into why you might need this upgrade, read our guide on Why You May Need a Starlink Mesh Wifi Router Extender.
Understanding Starlink Router Generations and Mesh Compatibility
Knowing your Starlink hardware is key to building a mesh network. Here’s a breakdown of the router generations and their capabilities:
- Gen 1 Router (Round Dish): The original router paired with the circular dish. It does not support Starlink's mesh nodes. A third-party mesh system connected via the Starlink Ethernet Adapter is your only option.
- Gen 2 Router (Rectangular Dish): The common router for the rectangular dish. It supports WiFi 5 and can create a mesh network with up to three official Starlink nodes. It requires an Ethernet adapter for third-party systems. A stable dish is critical; ensure your rectangular dish is securely installed with a weather-resistant mount to feed the best signal into your mesh network.
- Gen 3 Router (Standard/Flat High Performance): The latest router, offering faster WiFi 6 and tri-band performance. It fully supports mesh and includes two built-in Ethernet ports, so no adapter is needed for third-party systems. The Gen 3 dish also requires a solid foundation; explore our Gen 3 mounting solutions for maximum stability.
- Starlink Mini Router: Designed for portability and RV use, the Mini router is also mesh-compatible, allowing you to extend its range with other Starlink nodes. For on-the-go setups, a reliable portable mount is essential for consistent performance.
Here's a quick comparison of the Starlink routers and their mesh capabilities:
| Feature | Starlink Gen 2 Router | Starlink Gen 3 Router | Starlink Mini Router (Mesh Compatible) |
|---|---|---|---|
| WiFi Standard | WiFi 5 (802.11ac) | WiFi 6 (802.11ax) | WiFi 5 or 6 (depending on model/firmware) |
| Bands | Dual-Band (3x3) | Tri-Band (4x4) | Dual-Band |
| Range (Est.) | Up to 2,000 sq ft | Up to 2,500 sq ft | Designed for portability, extendable with mesh |
| Mesh Support | Limited (up to 3 nodes) | Yes, Tri-Band | Yes |
| Ethernet Ports | Requires separate Ethernet Adapter | 2 ports built-in | 1 port built-in (or via accessory) |
| Speed (Est.) | 1.8Gbps | 4Gbps | Varies with service |
| Security | WPA2 | WPA2 | WPA2 |
For more details on the Gen 3 and its mesh capabilities, check out our article on Starlink Gen 3: Maximising Coverage With Mesh Extenders.
Third-Party Mesh Routers for Starlink: Are They Worth It?
While Starlink's own mesh nodes are convenient, many users opt for third-party systems for their advanced features, greater coverage, and superior performance. For large properties or users with specific networking needs, they are often the better choice.
Key Considerations for Third-Party Systems:
- Starlink Ethernet Adapter: You'll need this adapter to connect a third-party system to a Gen 1 or Gen 2 Starlink router. The Gen 3 router has built-in Ethernet ports, simplifying setup.
- Bypass Mode: In the Starlink app, enabling "Bypass Mode" turns your Starlink router into a simple modem. This lets your new mesh system manage the network, giving you more control and access to advanced features.
- Performance: Premium third-party systems offer WiFi 7, quad-band technology, and massive coverage (up to 10,000 sq ft). This provides faster local network speeds and more reliable connections across large Australian properties.
The extra setup step is often a small price to pay for the significant boost in performance and customisation.
For a comprehensive comparison, read our article: Starlink Mesh vs Third Party: Which Reigns Supreme.
Key Features to Look for in Mesh Routers for Starlink
When choosing a third-party mesh system, these features make the biggest difference:

- WiFi Standard (WiFi 6 or WiFi 7): Newer standards mean faster speeds, lower latency, and better performance when many devices are connected.
- Tri-band vs. Dual-band: Tri-band systems have a dedicated "backhaul" band for communication between nodes. This prevents slowdowns and gives your devices maximum speed, making it a crucial feature for performance.
- Speed Ratings: Higher ratings (e.g., AX4200, BE27000) mean more bandwidth for your local network, which is great for transferring files between devices or streaming high-quality media.
- Coverage Area: Check the system's square footage rating to ensure it can cover your entire property. Premium 3-packs can cover up to 10,000 sq ft.
- MU-MIMO: This feature lets the router talk to multiple devices at once, improving efficiency in busy households with lots of connected gadgets.
- Number of Ethernet Ports: More ports provide greater flexibility for wired connections to gaming consoles, smart TVs, or a home office PC.
- Security Features: Look for modern WPA3 encryption, guest networks, and parental controls to keep your network secure.
Our guide, Mesh Made in Heaven: The Best Mesh Systems for Starlink Users, offers further insights into top choices.
Setting Up and Optimising Your Starlink Mesh Network
Proper setup is straightforward, but optimal placement is the key to performance.
1. The Role of the Starlink App The Starlink app is your command centre. For official Starlink nodes, the app makes pairing simple. Just plug in a new node, and the app will detect it and guide you through the setup in minutes.
2. Placement Strategy for Optimal Performance Getting placement right is crucial. Mesh nodes work best when they are close enough to get a strong signal from the main router.
- Central Router Location: Place your primary Starlink router in a central spot.
- The 1-2 Room Rule: Position each mesh node no more than one or two rooms away from the main router.
- Avoid Chaining: For best performance, connect all nodes directly to the main router rather than to each other in a "daisy chain."
- Clear Line of Sight: Keep nodes in open areas, away from thick walls, large metal objects, and appliances like microwaves.
- Node Limit: Starlink recommends a maximum of three mesh nodes for its system to maintain network efficiency.
You can find detailed instructions in the official Mesh Set Up Guide (PDF).
Wired Backhaul, Costs, and Troubleshooting
For the ultimate setup, consider these advanced topics.
Wired Backhaul vs. Wireless Mesh While wireless mesh is convenient, a wired backhaul (connecting nodes with Ethernet cables) offers superior speed and reliability. It eliminates wireless interference between nodes, freeing up WiFi bandwidth for your devices. We highly recommend it for large homes or connecting separate buildings like a shed or office.
Costs of a Starlink Mesh Network
- Official Starlink Mesh Nodes: You may need one to three.
- Third-Party Mesh Systems: Prices range from a few hundred dollars for a basic WiFi 6 system to over a thousand for a premium WiFi 7 setup. Remember to factor in the cost of a Starlink Ethernet Adapter for Gen 1/2 routers.
Common Troubleshooting Tips If you run into issues, try these simple fixes:
- Check Placement: Are nodes too far apart? Is the main router central?
- Power Cycle: Restart your main router and all mesh nodes.
- Check for Interference: Move nodes away from microwaves, cordless phones, or dense walls.
- Update Firmware: Ensure your router and nodes are running the latest software.
- Use the Starlink App: The app has diagnostic tools that can help identify problems.
You can find more performance hacks in our article: Boost Your Starlink Internet: Best Setup Performance Hacks.
Conclusion: Achieve Flawless Whole-Home Starlink Coverage
Getting reliable, wall-to-wall WiFi in regional Australia is achievable. By implementing mesh routers for Starlink, whether using official nodes or a powerful third-party system, you can eliminate dead zones and create a seamless network across your entire property.
However, even the best mesh system can't fix a poor signal at the source. Your mesh network is only as good as the internet it receives from your Starlink dish. If the dish is insecurely mounted, wobbling in the wind, or poorly positioned, your entire network performance will suffer.
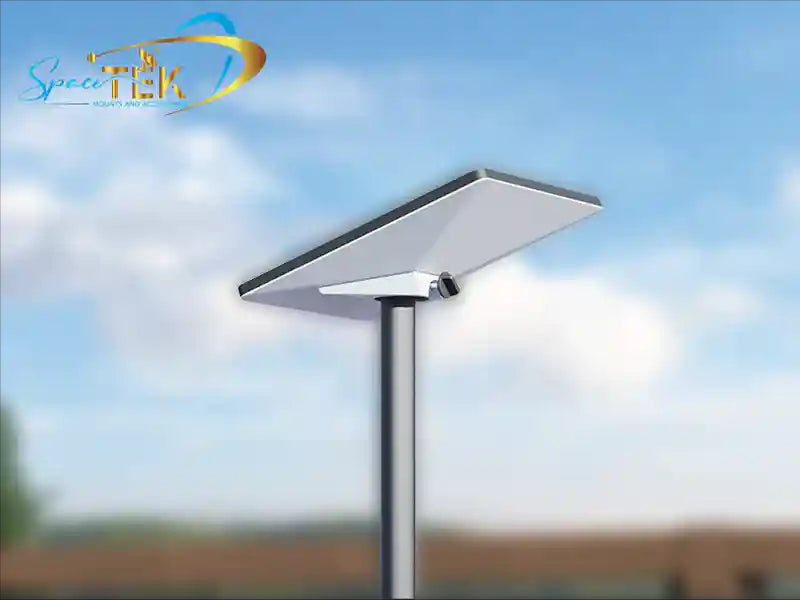
This is why a secure mount is the foundation of a great Starlink setup. At SpaceTek Australia, we design mounting kits specifically for harsh Australian conditions. Using high-quality, rust-resistant materials like aluminium and carbon fibre, our mounts ensure your dish stays perfectly aligned through heat, storms, and coastal salt air. They are fully compatible with Starlink's self-installer kits, giving you professional-grade stability without the complexity.
Achieving flawless coverage is a holistic approach: a stable dish feeding a strong signal to a well-configured mesh network. Don't let a poor mount undermine your investment.
For expert advice on your complete Starlink setup, from choosing the right mount to optimising your mesh network, don't hesitate to contact us. We're here to help you get the most out of your Starlink service, no matter where you are in Australia.

Leave a comment
This site is protected by hCaptcha and the hCaptcha Privacy Policy and Terms of Service apply.