Why Starlink Roof Installation Delivers Better Connectivity
Starlink installation roof setups usually deliver faster speeds and more reliable connections than ground-level alternatives.
Quick Answer: Best Practices for Starlink Roof Installation
- Location: Use the Starlink app to find a spot with a clear, unobstructed sky view (ideally north-facing in Australia).
- Mounting: Choose corrosion-resistant hardware suited to your roof type (metal, tile, or other).
- Installation: Secure the mount with pilot holes, apply waterproof sealant, and route cables carefully with a drip loop.
- Safety: Use a harness, non-slip footwear, and avoid wet or windy conditions.
- Professional help: Consider hiring a certified installer for complex roofs or steep pitches.
Many rural Australians struggle with unreliable NBN connections or patchy mobile coverage. Starlink is a genuine alternative, but how you install it makes a big difference.
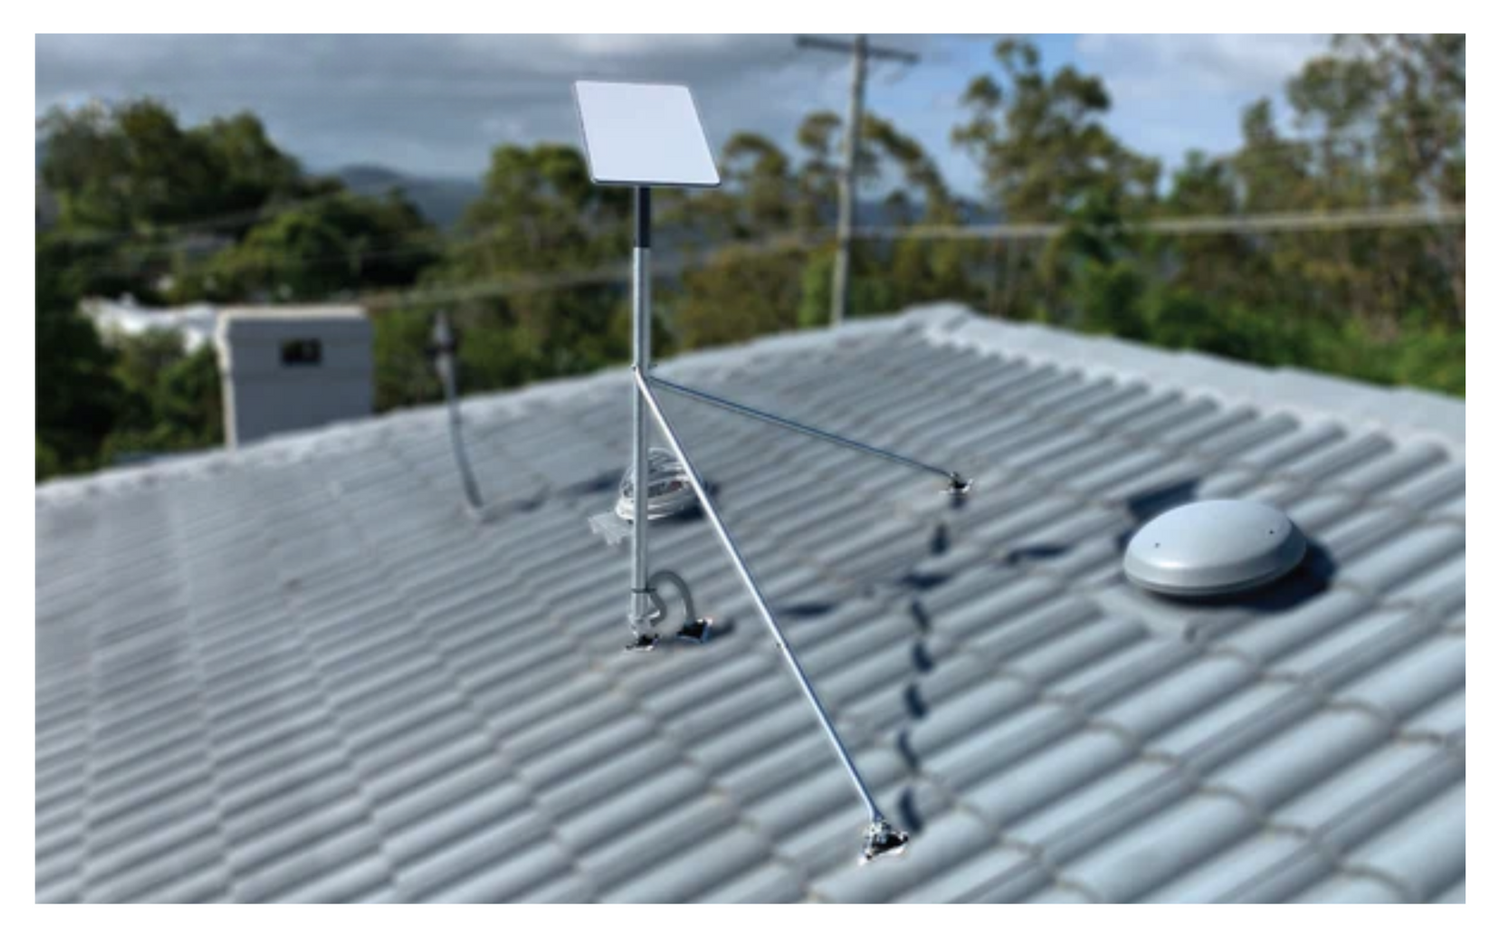
A roof-mounted dish avoids common obstructions like trees, fences, and sheds that can interrupt satellite signals at ground level. Extra height also helps in bad weather and keeps Dishy away from mud, water pooling, and curious pets.
The process comes down to selecting the right mount, fixing it correctly to your roof structure, and weatherproofing every penetration point. Different roof materials need specific mounting methods to protect the roof while keeping the dish solid in high winds.
I'm Aaron Wroblewski, founder of SpaceTek Australia. I've spent over 25 years working with satellite communications and remote connectivity solutions, including Starlink installation roof systems across Australian conditions. That experience from coastal homes to outback stations has shown exactly what holds up in our climate.
Why a Rooftop Installation is Best for Starlink
For most Australian homes, a Starlink installation on the roof is the best way to get consistent performance.
- Unobstructed sky view: Starlink needs a wide, clear view of the sky to stay locked onto satellites. Trees, buildings, and even sheds can cause dropouts. Mounting on the roof usually delivers a cleaner line of sight, better speeds, and fewer interruptions. Many users see an immediate improvement when they move from a ground tripod to the roof.
- Stable, elevated position: A roof is typically more stable and higher than any temporary ground setup. This matters in strong winds, heavy rain, and regional storms. Starlink is designed for harsh conditions, but a secure mount on the roof helps maintain uptime and keeps the dish exactly where it should be.
- Better protection in real-world use: While Dishy is weatherproof, a raised mount keeps it out of harms way. It is less likely to be knocked over, splashed with mud, or buried by debris. On rural and bush blocks, a rooftop install often means the difference between a marginal connection and a service you can rely on.
- Genuine set-and-forget: A properly installed roof mount becomes part of the building. Once it is fixed, sealed, and cabled, you should not need to touch it again apart from the odd visual check. Combine that with high-quality aluminium or carbon fibre mounting hardware and you get a long-term, low-maintenance solution built around the Starlink self-install kit.
Your Guide to Starlink Installation on a Roof
Starting a Starlink installation roof project can look daunting, but with the right gear and a plan, it is a realistic DIY job for many Australians.
Finding the Optimal Spot & Using the Starlink App
Location is the number one factor for performance.
Use the Starlink app’s "Check for Obstructions" tool. Hold your phone where you plan to mount the dish and let the app scan the sky. It highlights any likely blockages and helps you fine-tune the position. Aim for the widest clear sky view you can. In Australia, the dish will generally orient towards the northern sky.
The dish automatically adjusts its angle for the best link. Your job is to pick a spot with the least possible obstruction. You can cross-check with the official Starlink installation guide if needed.
Essential Tools and Mounting Hardware
Before you get on the roof, lay out everything you need:
- Power drill and drill bits suited to your roof and fasteners.
- Weather-resistant sealant for every penetration.
- Measuring tape and level to keep the mount straight.
- Screwdrivers and spanners for assembly.
- Safety gear: harness, non-slip footwear, gloves, and eye protection.
- Stable ladder that reaches at least one metre past the roof edge.
- Cable ties or clips for neat, secure cable runs.
- Portable power station if you are off-grid and need power for tools or testing.
While the Starlink kit allows for a temporary setup, a dedicated roof mount is essential for a permanent, weather-resistant installation.
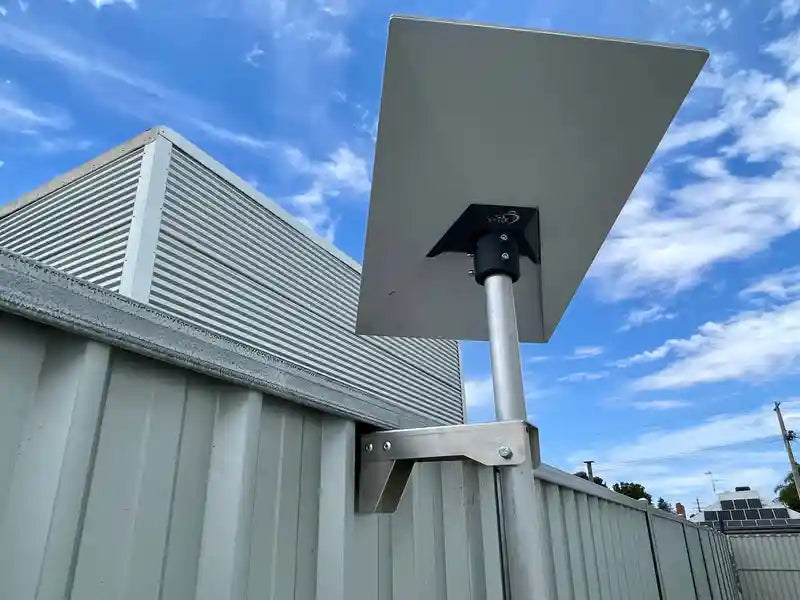
At SpaceTek Australia, we design high-quality aluminium and carbon fibre Starlink mounts that are:
- Corrosion-resistant for coastal and inland conditions.
- Compatible with Starlink self-install kits.
- Built for long-term exposure on Australian roofs.
We offer dedicated sections for each Starlink generation and use case so you can match the mount to your hardware:
- For the latest dish, explore our Gen 3 / V4 Starlink roof mounts.
- If you have the rectangular Dishy, see our Gen 2 Starlink mounts.
- For compact and portable setups, our Starlink Mini mounts provide flexible options.
Adapting Your Starlink Installation for Different Roof Types
Australian homes use a mix of roof materials, and each one needs a slightly different approach for a secure, watertight Starlink installation roof.
- Metal roofs (corrugated iron, Colorbond): Where possible, use non-penetrating clamps to protect the sheet and reduce the chance of leaks. If you must drill, choose corrosion-resistant aluminium mounts, use the correct screws, and seal every penetration thoroughly. Our tin roof mount kit for Dishy Gen 3/V4 is engineered for this style of roof, and we also offer a tin roof kit for the rectangular Gen 2 dish.
- Tiled roofs: Tiled roofs need more care to avoid cracking tiles or creating leak points. Use specialised brackets that tie back to the rafters and sit under or alongside tiles without lifting them excessively. Our tile roof mount kit for Gen 3/V4 includes hardware designed for secure, discreet, and waterproof mounting. Equivalent solutions are available for Gen 2.
- Flat or membrane roofs: These often work best with ballast or flashing mounts that spread load and integrate with the roofing system. Always confirm the mount is compatible with your roof material and any local building requirements.
Whatever the roof type, the priorities are the same: maintain roof integrity, use rust-resistant materials, and ensure the mount can handle strong winds and intense sun over many years.
For a broader view of options, you can browse our full range of roof mounting hardware for Starlink.
The Step-by-Step Process for a Secure Starlink Installation on Your Roof
Once you have the location, tools, and hardware sorted, you can move through the install methodically:
- Prepare the mount and location: Assemble the mount on the ground. Position it on the roof where the app showed the clearest sky view.
- Mark and drill pilot holes: Use a tape and level to mark fixing points. Where practical, fix into rafters or structural members. Drill pilot holes sized for your fasteners.
- Apply sealant: Fill and surround each pilot hole with high-quality, UV-resistant sealant before driving screws. This is critical for long-term weatherproofing.

- Secure the mount: Fix the mount firmly, checking it is level and does not flex under load. Our aluminium and carbon fibre mounts are engineered to stay rigid in high winds while resisting rust.
- Attach Dishy: Mount the Starlink dish according to the hardware instructions. Most mounts use either a slide-and-lock or simple bolted connection.
Route the cable: Plan a short, direct cable run into the house. Avoid sharp bends and pinch points. Use outdoor-rated clips or conduit to secure the cable along the roof and wall, and create a drip loop near the entry point so water falls away from the building.
Weatherproofing and durability: Use UV-stable materials for all external fixings. For cable entry points, consider our IP68 waterproof bulkhead connector for Starlink Gen 3 or similar accessories from our Starlink cables and accessories range. In areas exposed to cyclones or strong southerlies, extra bracing or tethering may be worthwhile.
- Connect and activate: Once the cable is inside, connect it to the Starlink router and power supply, then complete activation through the Starlink app.
Critical Safety Precautions for a DIY Starlink Installation on a Roof
Working at height is risky. Keep these basics in mind:
- Only work in dry, calm weather.
- Use a properly fitted safety harness on steep or high roofs.
- Wear non-slip, closed shoes.
- Set your ladder on firm, level ground and have someone steady it.
- Stay well clear of power lines and electrical conduits.
- Have another person on site in case you need help.
If you are unsure at any stage, step back and reconsider whether DIY is the right option. You can also refer to the Starlink installation guide for rectangular dishes for additional safety notes.
Finalising Your Setup and When to Call a Pro
Powering Up and Checking Performance
Once your Starlink installation roof work is done, you can bring the system online:
- Connect to power: Plug in the Starlink router and power supply. Dishy will boot, search for satellites, and align itself.
- Connect devices: Join the Starlink Wi-Fi network, or connect via an Ethernet cable for a wired connection.
- Verify performance: Use the Starlink app to confirm online status, check for obstructions, and run a speed test. Many users see a noticeable jump in reliability once their dish is correctly roof-mounted.
When It Makes Sense to Hire a Professional Installer
DIY does not suit every roof or every person. It is worth calling in a pro if:
- Your roof is steep, high, or has awkward access.
- The design is complex, with multiple levels, valleys, or limited fixing points.
- You are not comfortable on a roof or using power tools.
- Your council, builder, or strata has specific external installation rules.
- You would rather pay for a fast, clean install than buy extra tools and safety gear.
SpaceTek Australia works with certified installers who understand our aluminium and carbon fibre mounts, Australian roofing styles, and Starlink self-install hardware. They can handle everything from simple tin roofs to complicated multi-storey homes. You can easily find a professional installer through our network.
Why Correct Starlink Roof Installation Matters
A well-executed Starlink installation on the roof is about more than just getting online. It is the difference between a link that struggles and one that stays solid through summer heat, winter storms, and regional blackouts.
Choosing the right mount for your Starlink generation (Mini, Gen 2, or Gen 3), matching it to your roof type, and installing it with proper sealing and cable management delivers:
- More reliable connectivity for work, school, and streaming.
- Better weather resistance in harsh Australian conditions.
- Longer hardware life thanks to rust-resistant, high-quality materials.
- A clean, permanent setup that works with Starlink’s self-install kit instead of fighting it.
SpaceTek’s mounts are designed specifically for Australian roofs and conditions. They are secure, rust-resistant, and user-friendly, so you can focus on using your connection rather than fixing it.
If you are unsure which mount suits your roof, dish generation, or location, contact us to get expert advice from the SpaceTek team. We can help you choose the right hardware and approach so your Starlink installation roof setup is done once and done properly. You can also get in touch if you would like a recommendation for a local installer.

Leave a comment
This site is protected by hCaptcha and the hCaptcha Privacy Policy and Terms of Service apply.