
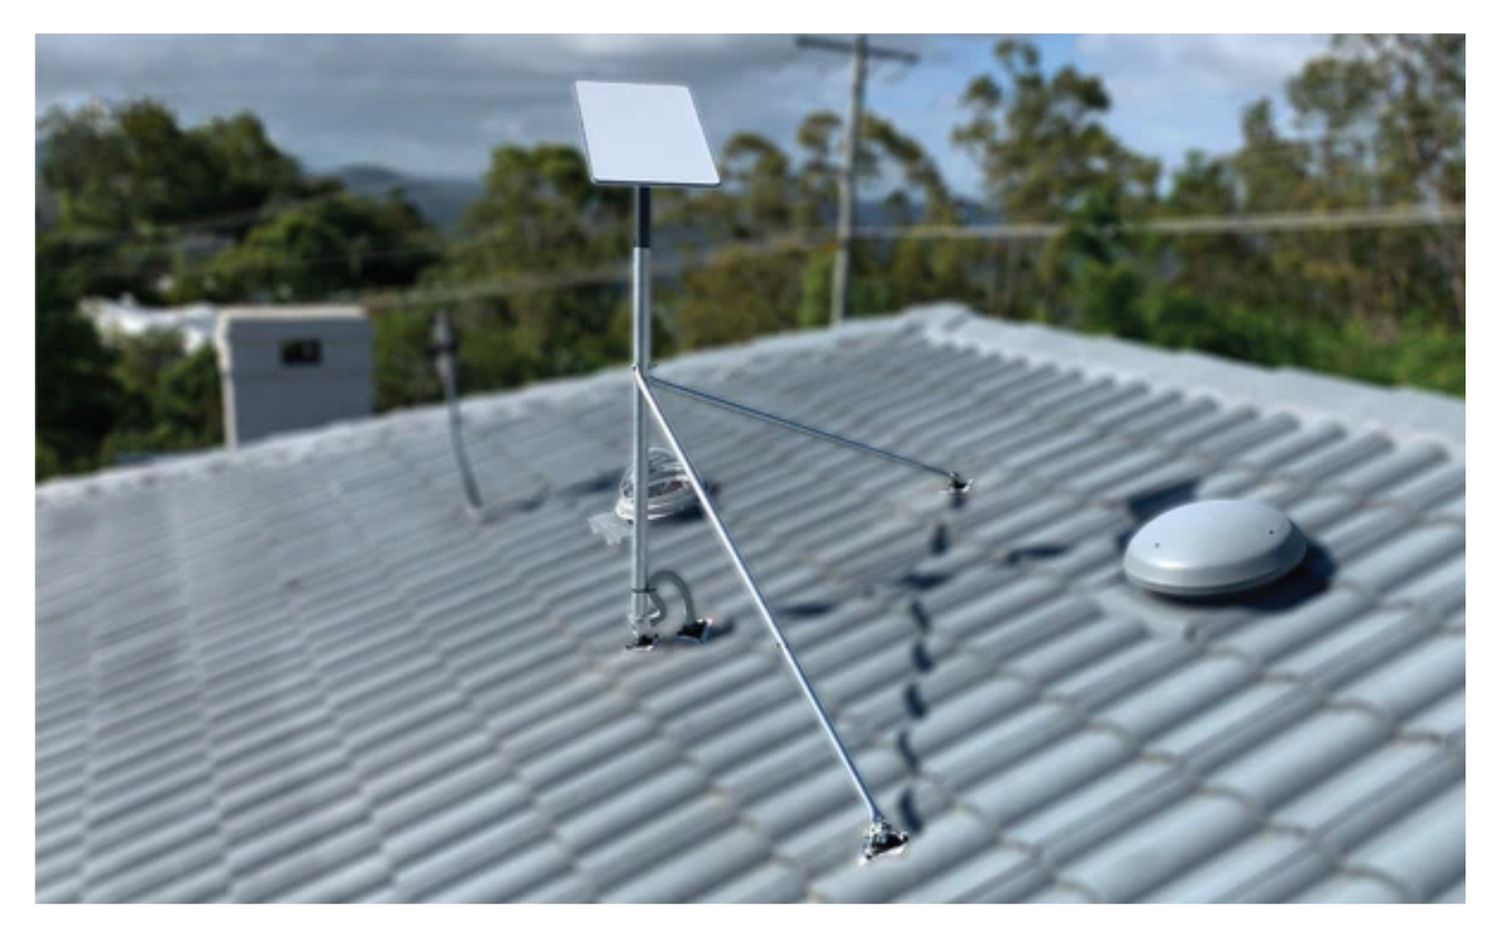
Why does the optimal Starlink dish angle matter?
In Australia, the best Starlink dish angle usually means facing the dish toward the southern sky, with a clear view and no trees, rooflines, or sheds cutting into the app’s obstruction scan.
For most Australian homes, farms, caravans, and off-grid setups, the exact angle matters less than giving the dish a clean 100–110 degree window of open sky.
Key Takeaways
- In Australia, Starlink dishes generally need a clear southern sky view rather than a northern-facing setup.
- The Starlink app is the easiest way to check your actual position, angle, and obstruction risk before you lock anything in.
- Gen 2 actuated dishes self-align once the mast is installed correctly, while Gen 3 and Mini dishes need manual alignment through the app.
- Trees, rooflines, sheds, and seasonal gum tree growth can cause dropouts even when the dish looks roughly pointed the right way.
- A strong Starlink mount helps keep the dish steady through wind, storms, coastal salt air, and hot Australian conditions.
That is the simple version. Starlink is not like an old satellite TV dish that points at one fixed satellite above the equator. It connects to low Earth orbit satellites moving across the sky, so your dish needs a wide, clear sky window rather than one perfect compass bearing.
If you are setting up Starlink on a rural block, a caravan, a shed, or a coastal home, the goal is straightforward: find the clearest southern view, check it with the app, then mount the dish securely enough that it stays there.
How do you find the best Starlink dish angle for maximum speed?
When you are setting up your system, finding the best Starlink dish angle is what helps prevent dropouts, laggy video calls, and inconsistent speeds. The dish needs enough open sky to keep handing your connection from one passing satellite to the next without trees or buildings getting in the way.
If your dish is tilted badly, mounted too low, or placed where part of the sky is blocked, you may still get internet, but it will not be as stable as it should be.
The easiest first step is to use the Starlink app’s obstruction scanner before you drill, bolt, or permanently mount anything. It shows whether your chosen spot has enough clear sky and helps you avoid guesswork. If you want the full hardware walkthrough, read SpaceTek’s guide on how to align a Starlink dish.
How does the setup differ between Gen 2 and Gen 3 dishes?
The physical setup depends on which Starlink dish you have:
- Gen 2, Standard Actuated: This dish has internal motors. Once powered, it will calibrate and tilt itself toward the best available position, provided the mast is installed close enough to vertical.
- Gen 3, Standard V4: This dish does not have internal motors. It uses a fixed kickstand and needs manual alignment through the Starlink app during setup.
- Starlink Mini: This compact dish is also manually aligned, which makes app guidance especially important when you move between campsites or off-grid locations.
If you are using the latest flat-panel hardware, SpaceTek’s guide on setting up a Gen 3 Starlink dish explains the process in more detail.
What is the quickest way to align a manual Starlink dish?
For a Gen 3 dish or Starlink Mini, follow the app rather than trying to guess the angle by eye:
- Open the Starlink app while connected to your Starlink Wi-Fi.
- Choose the Alignment tool from the dashboard.
- Stand behind the dish and watch the direction guide on your phone.
- Slowly rotate the dish until the on-screen marker sits inside the green target area.
- Tighten the dish mount so the position cannot shift in wind.
- Reset the obstruction map so Starlink can build a fresh view of the sky over the next several hours.
If the app keeps warning you about obstructions, SpaceTek’s guide to fixing Starlink dish obstructions has practical options for difficult Australian installation spots.
Which direction should a Starlink dish face in Australia?
In Australia, your Starlink dish generally needs to face the southern sky. That can surprise people who are used to older satellite dishes, but Starlink works differently because it connects to moving low Earth orbit satellites rather than one fixed satellite.
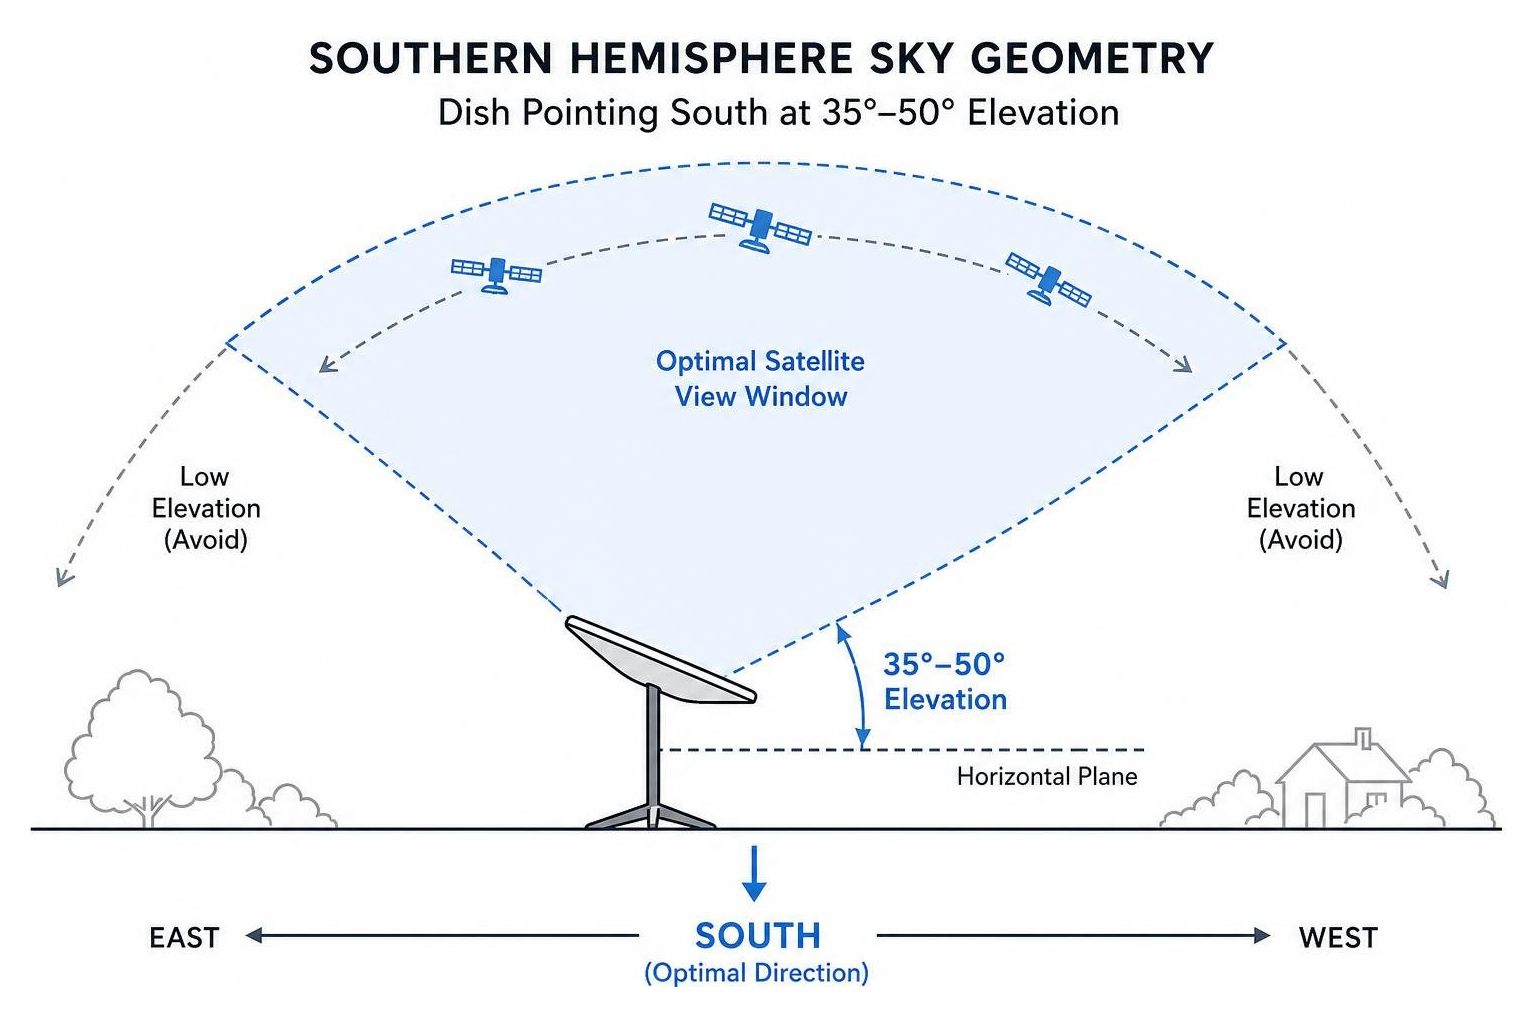
As a general guide, many Australian setups sit somewhere around 35 to 50 degrees above horizontal, but the app should always be your final reference. Your exact position, local terrain, trees, and the dish model can all affect the best setup.
For a deeper local explanation, read SpaceTek’s guide to Starlink dish angles in Australia.
Why does Starlink point south here?
Starlink dishes in Australia look toward the southern sky because that is where they can maintain a practical view of the satellites they need while avoiding interference with older satellite systems around the equator.
The plain-English version is this: your dish is not trying to hit one fixed target. It is trying to keep a clean view of enough passing satellites so the connection can shift smoothly between them.
Does elevation affect speed and reliability?
Yes. A better elevation angle can help the dish maintain cleaner satellite contact, which supports steadier speeds and lower latency.
Starlink satellites orbit much closer to Earth than traditional geostationary satellites, which is why Starlink can deliver responsive performance for video calls, streaming, gaming, and remote work. The dish uses phased-array technology, meaning it can steer its signal electronically without physically moving every time a satellite passes overhead.
In practical terms, you do not need to become a satellite engineer. You just need to give the dish the clearest possible sky view, follow the app, and make sure the mount keeps the dish steady.
What matters more: dish angle or clear sky view?
A clear sky view matters more than chasing a perfect angle by eye. Starlink needs a wide open field of view, usually around 100 to 110 degrees, so it can stay connected as satellites move overhead.
If a tree canopy, roof edge, shed, ridge line, or nearby structure cuts into that sky window, you can get dropouts even if the dish appears to be facing the right direction.
What happens if the dish angle is slightly off?
A slightly imperfect angle may still work, but it can create annoying performance issues. You might notice slower speeds, short dropouts, app warnings, or weaker performance in poor weather.
Common problems include:
- Inconsistent download speeds: The dish may lose clean satellite contact during handovers.
- Water and dirt build-up: Very flat installs can allow rain, dust, and debris to sit on the dish face.
- Higher power demand: A weaker signal can make the system work harder to maintain the connection.
- Less reliable tracking: The dish has fewer clean satellite paths available at any one time.
For long-term reliability, set the dish up properly from the start rather than accepting a half-good result.
How do trees and seasonal growth affect Starlink?
Australian properties can be tricky, especially where gum trees, scrub, or windbreaks sit close to the house, shed, or campsite.
A spot that looks fine in winter can become a problem in spring as foliage thickens. Wind can also push branches into the dish’s field of view during rough weather.
To reduce obstruction problems:
- Lift the dish higher: A roof ridge or taller mast often works better than moving the dish a few metres sideways.
- Allow for wind movement: Keep extra clearance around branches that sway in strong gusts.
- Trim before final mounting: Clear problem branches before committing to a permanent position.
- Re-scan seasonally: Run the app obstruction scanner again when tree growth changes.
How do you keep the dish angle steady after installation?
Finding the best Starlink dish angle is only half the job. Keeping it steady through wind, storms, coastal air, and harsh sun is what protects your connection over time.
If your dish mount flexes, shifts, or vibrates in strong wind, the dish can move outside its alignment tolerance and trigger warnings in the app.
What should you look for in a Starlink mount?
SpaceTek Australia designs Starlink mounts for tough Australian conditions, including heat, storms, coastal salt air, and remote-property installs. The goal is simple: hold the dish firmly so the angle you set does not drift over time.
When choosing a dish mount, look for:
- Folded aluminium construction: Strong, lightweight material suited to Australian roof installations.
- Corrosion resistance: Important for coastal regions and exposed outdoor locations.
- Low movement in wind: A rigid setup helps stop the dish shifting during gusty weather.
- Secure clamping: The mount should hold the dish firmly once aligned.
What about portable and off-grid Starlink setups?
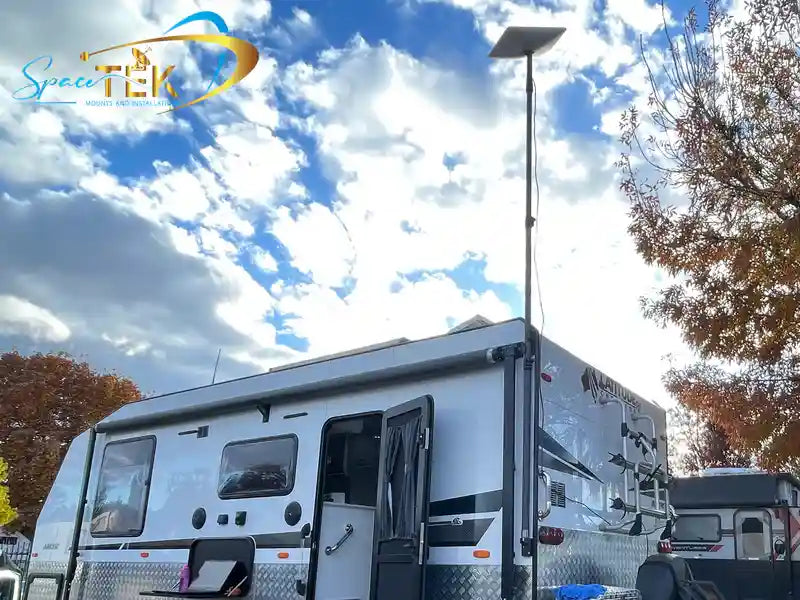
For grey nomads, campers, 4WD owners, and off-grid travellers, the best angle can change every time you pull into a new site. A caravan park, bush camp, beach track, or farm stay can each have different tree cover and sky visibility.

Power setup matters too. For off-grid Starlink use, DC-to-DC power is generally a better choice than running through an AC inverter because it is more efficient, reduces unnecessary draw, and can support custom setups that bypass the Starlink router.
SpaceTek’s StarPower V2, V3, and V4 DC power supplies are built for these kinds of custom Starlink setups, while the Starlink Mini gear range covers portable mounting and camping accessories.
Frequently Asked Questions About Starlink Alignment
Why does my Starlink dish face south in Australia?
Starlink dishes in Australia generally face south because that gives them a practical view of the satellite paths they use here while avoiding interference with older satellite systems around the equator.
What does the Starlink Misaligned error mean?
The Starlink Misaligned warning usually means the dish has shifted away from its expected position. Loose fasteners, wind movement, an unstable pole, or a knocked dish mount can all cause it. Re-open the app’s alignment tool, adjust the dish, and tighten the mount securely.
Do I need to realign my dish when gum trees grow in spring?
Usually, you do not need to change the dish direction unless the app tells you to. The bigger issue is new foliage entering the dish’s field of view. If branches start blocking the southern sky, prune them where safe or move the dish higher.
Keep your Starlink connection steady in Australian conditions
Finding the right Starlink dish angle is really about giving the dish a clear southern sky view, checking the location with the app, and mounting it securely enough that it stays put.
For Australian homes, farms, caravans, and off-grid setups, that means thinking about gum trees, rooflines, wind, storms, coastal exposure, and seasonal growth before you lock in the final position. Pair careful alignment with a strong SpaceTek Australia dish mount, and your Starlink setup has a much better chance of staying fast, stable, and reliable long term.

Leave a comment
This site is protected by hCaptcha and the hCaptcha Privacy Policy and Terms of Service apply.