
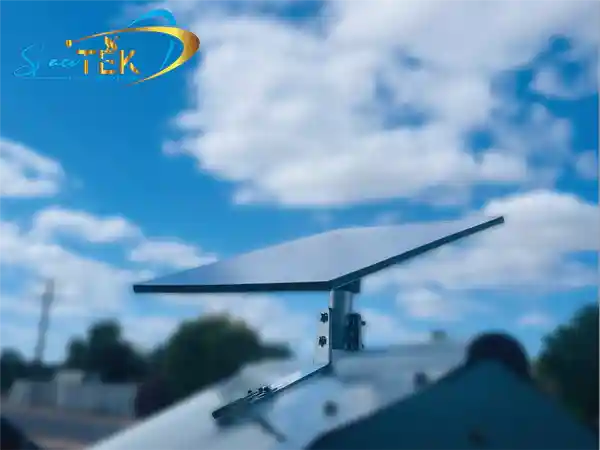
Can You Really Self-Install Satellite at Home?
Yes, you can self-install satellite internet or TV at your Australian home, farm, or remote property with the right gear, a clear view of the sky, and a careful setup process. It is a practical DIY job for many people, but safety, weatherproofing, and correct alignment still matter.
Key Takeaways
- Choose a safe location with a clear, unobstructed view of the sky before you drill or mount anything.
- Use sturdy dish mounts or Starlink mounts fixed to a solid structural point, not thin cladding or loose sheeting.
- Plan cable runs carefully, seal every wall entry point, and create a drip loop to help keep water out.
- Use your provider’s app or a signal meter to check obstructions, align the system, and confirm performance.
- For off-grid Starlink setups, SpaceTek StarPower DC power supplies can reduce power draw by avoiding an AC inverter.
If you are in rural or regional Australia, modern satellite systems can be a solid way to get connected without waiting around for a technician. Starlink in particular is designed for self-installation, while free-to-air satellite TV systems still need a bit more patience with dish alignment.
Why Self-Install Satellite TV or Internet?
Taking the DIY route gives regional Aussies more control over timing, placement, and cost. Instead of waiting for a technician to travel out to your property, you can set up the system when it suits you and choose the mount location that best fits your roof, wall, shed, caravan, or campsite.
For satellite TV, installing your own dish can open up access to Australian free-to-air services such as VAST, provided your equipment and location are suitable. For satellite internet, many modern systems are designed with customer installation in mind, so the main challenge is usually choosing the right position and securing everything properly.
The biggest benefit is flexibility. You might want a temporary setup for a caravan, a neat roof installation at home, or a more rugged option for off-grid travel. If you are setting up high-speed satellite internet, our guide on how to install Starlink walks through the process in more detail.
Where Should You Put Your Satellite Dish or Terminal?
Before you grab the drill, spend time finding the right spot. Satellite signals need a direct line of sight, so trees, chimneys, rooflines, sheds, and nearby structures can all cause dropouts or weak reception.
Use your provider’s mobile app where available. The Starlink app, for example, lets you scan the sky from your proposed install location and check for obstructions before you commit to a mount position.
If you are renting or dealing with body corporate rules, avoid drilling until you know what is allowed. Non-penetrating options such as gutter, balcony, or ballasted ground setups may suit some properties, provided they are secure and suitable for local wind conditions.
Also think about future access. You want the dish or terminal somewhere safe enough to inspect, clean, or adjust if needed, not perched in a spot that turns every bit of maintenance into a risky roof climb. For more help choosing a practical location, read our guide on where to set up your Starlink dish.
What Tools and Safety Checks Do You Need?
Safety comes first when you self-install satellite hardware. Roofs, ladders, power lines, and bad weather can turn a simple job into a dangerous one, so do not rush it or take shortcuts.
Have these basics ready before you start:
- A sturdy ladder and slip-resistant footwear
- A hammer drill with suitable bits for the surface you are drilling into
- A carpenter’s level to keep the mount plumb
- Outdoor-rated silicone sealant for weatherproofing entry points
- A socket set, spanners, cable ties, and wall clips
- A smartphone app or signal meter for alignment checks
Keep well clear of overhead power lines, avoid working on wet or windy days, and use proper fall protection if you are working near roof edges. If the safest mounting position is hard to access, it is worth getting professional help rather than risking a fall.
Operational satellite equipment can also emit radiofrequency energy, so avoid standing directly in front of a powered dish or terminal for extended periods. Mount it where kids and pets cannot easily tamper with it.
Before climbing up, run through our Starlink mount safety checklist so you are not halfway through the job before realising you have missed something important.
How Do You Self-Install Satellite TV and Internet Systems?
Once you have picked the location, gathered your tools, and checked the safety side, you can move into the physical installation.
Every successful self-install satellite project starts with a solid mount. If the mast is loose or not level, wind and vibration can affect the signal, so fix your dish mounts or Starlink mounts to a proper structural point wherever possible.
How Do You Mount and Connect the Hardware?
Follow the manufacturer’s instructions for your exact dish, terminal, receiver, or router, then work through the job in order:
- Assemble the dish or terminal: Lay the parts out on a soft surface and check that nothing is missing before you start.
- Secure the mount: Position the mount, check it is plumb, mark and drill the holes, seal the fixings, and tighten everything firmly.
- Attach the dish or terminal: Fit the hardware into the mount. Leave adjustment points slightly loose if manual alignment is required.
- Route the cable: Run the cable neatly to the entry point, avoiding sharp bends, crushed sections, and exposed spots where it may rub.
- Create a drip loop: Leave a small downward loop before the wall entry so rainwater drips off the cable instead of running indoors.
- Seal the entry point: Use a suitable wall bushing and outdoor-rated sealant to protect the hole from water ingress.
- Connect the indoor equipment: Plug the cable into the modem, router, receiver, or power supply, then power the system on.
If you are building a portable or off-grid Starlink setup, power choice matters. SpaceTek StarPower V2, V3, and V4 DC power supplies let compatible setups run directly from a caravan or vehicle battery system, helping reduce draw by avoiding the losses that come with an AC inverter.
For custom setups, DC-to-DC power can also let you bypass the standard Starlink router where suitable, which is handy when you want a cleaner, more efficient camping or touring arrangement.
How Do You Align the Dish for a Strong Signal?
With the hardware secure, alignment is the next big job. Traditional satellite TV dishes usually need careful manual adjustment across three settings:
- Azimuth: The left-to-right direction of the dish.
- Elevation: The up-and-down angle toward the satellite.
- Skew: The rotation of the LNB so it lines up with the signal.
Use a satellite finder meter, receiver signal screen, or suitable app to make small adjustments and wait a few seconds after each movement for the signal reading to settle.
For Starlink, the process is usually more app-guided. Some terminals adjust themselves, while Starlink Mini setups rely more on careful positioning and manual alignment through the app. Take your time here, because a small obstruction can still cause annoying dropouts.
For more detail on getting the angle right, see our guide to Starlink dish installation and alignment.
What If Your Self-Install Satellite Setup Is Not Working?
Even a careful install can need a bit of troubleshooting. Start with the simple checks before assuming something major is wrong:
- No signal or searching message: Check every cable connection, make sure connectors are dry, and re-scan for obstructions.
- Slow speeds or dropouts: Look again for small obstructions such as branches, leaves, or nearby roof edges, then power cycle the system.
- System will not power on: Check the power source, battery condition, and cable connection. For off-grid Starlink, a dedicated SpaceTek StarPower DC power supply can help deliver cleaner, more stable power than an inverter-based setup.
- Router or modem problems: Follow the manufacturer’s reset process for your exact model, especially if the unit becomes unresponsive.
Common Questions About DIY Satellite Installation
Can I Install a Satellite Dish on an Apartment Balcony?
Yes, in some cases. If you are renting or dealing with body corporate rules, a non-penetrating balcony or ballasted mount may be an option, as long as it is safe, secure, and allowed where you live. You still need the correct sky view, so a covered or badly positioned balcony may not work.
Do I Need a Professional to Ground My Satellite System?
For safety-critical electrical work, follow Australian requirements and get a licensed electrician where needed. You may be able to physically install some low-voltage components yourself, but grounding, earthing, and lightning protection need to be done properly for your property and equipment.
How Does Weather Affect a Self-Installed Satellite Signal?
Heavy rain can temporarily reduce signal strength, and strong wind can move a poorly secured dish or terminal. Good alignment, sturdy Starlink mounts or dish mounts, and careful cable weatherproofing all help keep the system more reliable in Australian conditions.
Ready to Build a Better Satellite Setup?
Self-installing satellite internet or TV can be a very achievable DIY project when you choose a safe location, use the right mount, route cables properly, and take your time with alignment. The aim is not just to get connected today, but to build a setup that keeps working through wind, rain, heat, and regular Aussie use.
SpaceTek Australia designs premium Starlink mounts, dish mounts, and off-grid accessories for Australian conditions, including folded aluminium and reinforced composite components built for long-term outdoor use.
If you are planning a home, caravan, or remote-area Starlink setup, get in touch through the SpaceTek contact page and the team can help you choose the right gear for the job.


Leave a comment
This site is protected by hCaptcha and the hCaptcha Privacy Policy and Terms of Service apply.