
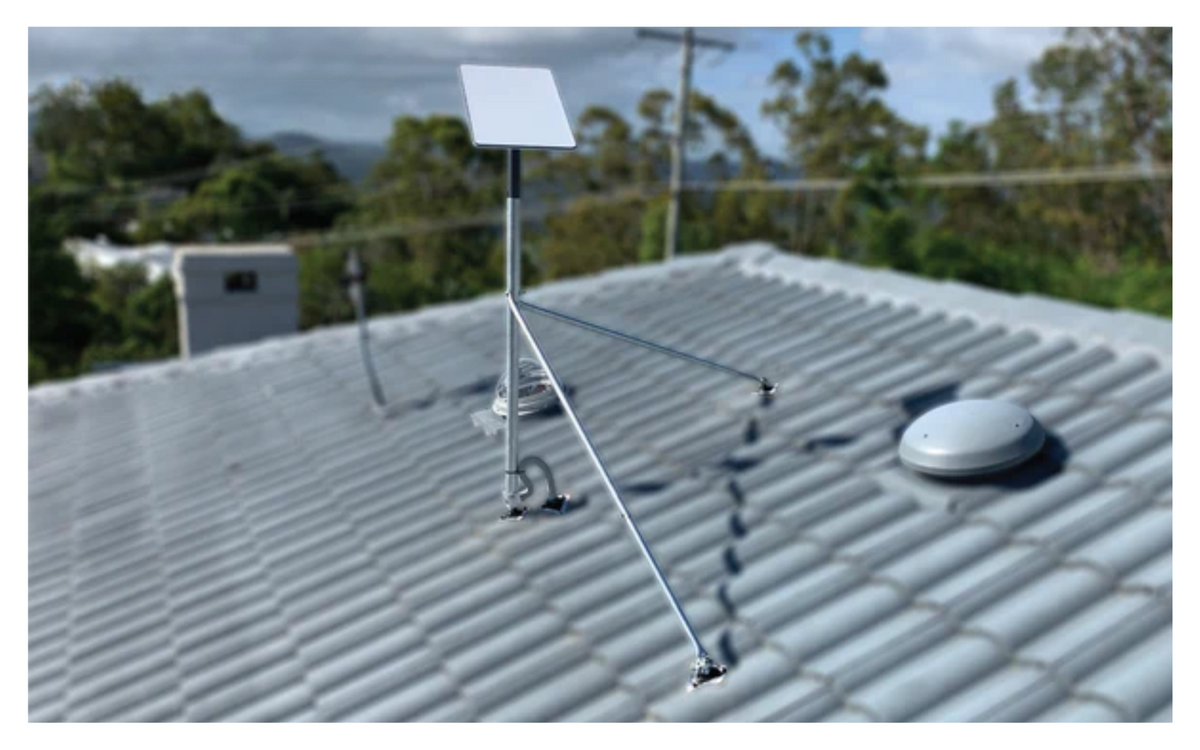
Why Should You Install Starlink on a Ground Adapter?
A Starlink dish ground adapter helps you secure your dish on a dedicated ground pole when a roof setup is not the best fit. It is a practical option if trees, shed roofs, rental rules, tin roofing, or safety concerns make a roof installation tricky.
Key Takeaways
- Choose a ground setup only after using the Starlink app to check for clear sky and avoid dropouts.
- Match the adapter to your Starlink model and the outside diameter of your pole before buying anything.
- Protect outdoor cabling with conduit so lawn gear, livestock, wildlife, and rough weather do not damage it.
- Keep the dish clear of grass, debris, and anything else that can interrupt its wide field of view.
- Follow a proper Starlink ground mount installation process so the pole, cabling, and dish mount stay tidy and stable.
Before securing any hardware into the ground, take a minute to pick the right spot. Starlink dishes need a broad, open view of the sky because the antenna constantly tracks satellites as they pass overhead. The easiest way to check your position is to stand where the pole will go and use the obstruction scanner in the Starlink app.
Look around for gum trees, powerlines, sheds, fences, and anything else that might clip the signal. If you are setting up on a rural property, also think about how the area changes through the year. Long grass, fallen branches, livestock movement, and seasonal growth can all become problems after the pole is already in place.
How Do You Choose the Right Starlink Dish Ground Adapter?
Choosing the right Starlink dish ground adapter comes down to three things: your dish model, the outside diameter of the pole, and how exposed the site is to wind and weather. Get those sorted first and you will avoid most loose-fitting, wobbly, or short-lived ground setups.
When selecting hardware, refer to the manufacturer's Starlink ground pole mount guidelines alongside your own pole measurements:
- Standard Gen 3 (V4 / UTA-232): Clamps to poles with an outside diameter of 36.5 mm to 40 mm using a quick-release clamp and locking collar.
- Starlink Mini (UTA-231): Fits 49 mm to 52 mm outside diameter poles via a multi-fit kickstand and pole adaptor sleeve.
- Flat High Performance: Uses a dedicated pipe profile with a bolt-down wedge mount and pipe adaptor.
- Standard Actuated (Gen 2): Connects to 38 mm to 50 mm mast sleeves using a push-button mast adaptor.
What Works for a Standard Gen 3 V4 Starlink Dish?
The Standard Gen 3 (Model UTA-232) dish has a kickstand-style rear plate rather than a motorised mast. That makes it flexible, but it also means the fit between the dish, the adaptor, and the pole matters a lot in gusty Australian conditions.
For a cleaner and more secure fit, SpaceTek's precision-machined aluminium and reinforced composite dish mounts are designed to sit neatly around compatible poles. If you want a portable option for testing locations, camping, or temporary ground placement, a Starlink Standard Gen 3 V4 ground kickstand gives the dish a stable footprint while keeping the casing off damp soil.
What About Starlink Mini and Flat High Performance Hardware?
The compact Starlink Mini (Model UTA-231) is built for portability, so it needs hardware that suits both travel and quick setup. A quick-release kickstand and pole adaptor lets you move between a flat surface, a ground pole, or a tripod-style setup without turning the job into a full rebuild.
For commercial or heavy-data residential setups, the Flat High Performance terminal takes a different approach. Because it has no internal motorised tracking, it relies on fixed-tilt alignment. The official Starlink Flat High Performance pipe adaptor guide explains how its pipe adaptor mates with the wedge-style setup used for correct drainage and alignment.
What Tools and Steps Are Needed to Secure a Ground Mount Pipe Adapter?
Installing a pipe adaptor on a dedicated ground mast is easier when you have the right hand tools ready before you start. If you are assembling a heavy-duty or Flat High Performance adaptor kit onto a ground pipe, work slowly, keep the hardware organised, and avoid tightening everything fully until the parts are lined up properly.
Required Tools and Fasteners
- 5/32-inch hex key (Allen key)
- 7/16-inch wrench or spanner
- Hardware kit: 4 lock nuts, 4 flat washers, 4 long machine screws (1/4-20 x 3/4"), 6 short machine screws (1/4-20 x 9/16")
- Liquid thread locker (medium strength)
Step-by-Step Installation Process
- Disconnect the power: Make sure power to the terminal is completely disconnected before handling the dish or mounting hardware.
- Assemble the base to the wedge: If you are using an angled wedge mount, insert the four longer machine screws with washers through the underside of the wedge mount base.
- Attach the pipe adaptor: Align the adaptor collar over the four protruding screws. Add a washer and lock nut to each screw, then tighten them evenly with your wrench until they sit flush against the mounting face.
- Prepare the set screws: Apply a small drop of medium-strength thread locker to the short machine screws. Thread them loosely into the outer collar of the adaptor.
- Mount and align: Slide the assembly over your cemented ground pole. Rotate the adaptor so the dish faces the best direction from your app survey, then tighten the machine screws evenly with your hex key so the collar clamps down on the pipe.
- Route the cables: Plug in the connection cable and leave a drip loop so rainwater does not track straight into the port.
If you are comparing different hardware styles before you start, it helps to look at ground, roof, and caravan setups side by side so you can choose the neatest fit for your property.
What Environmental Limitations and Safety Precautions Should You Follow?
Australian weather can be rough on outdoor communications gear. Harsh UV, coastal salt air, dusty paddocks, and sudden storm fronts all make a solid ground setup worth doing properly from the start.
How Straight Does the Pole Need to Be?
Motorised Starlink models, such as the Gen 2 Standard Actuated, need to sit within the correct vertical range so the dish can move as intended. The mounting pole should be plumb, ideally within 5 degrees of vertical, and it should never be installed at a steep angle that stops the dish from tracking properly.
Mounting a motorised Starlink dish horizontally, such as flat against the side of a wall, can stop it from operating correctly. When the dish cannot move freely to track satellite passes, the system may shut down and show a 'Motors Stuck' alert in the Starlink app.
What Should You Do About Wind?
Starlink mounts are not designed for severe storm or cyclone-level conditions, so do not treat any exposed pole as set-and-forget. In open paddocks, coastal areas, and windy rural blocks, add structural support where needed and check the setup after rough weather.
For taller ground poles, heavy-duty guy wire tethering can help reduce sway and protect the dish mount from repeated movement. If the site is highly exposed, it is worth getting a qualified installer to assess the pole footing, tether points, and safe cable route.
What About Power, Earthing, and Lightning?
- Grounded outlets: The power supply should connect to an earthed 3-pin AC outlet when you are using a mains-powered setup.
- DC power setups: For off-grid use, StarPower V2 and V3 DC power supplies can be a better fit than running through an AC inverter because they support more efficient DC-to-DC operation, lower draw, and the ability to bypass the standard Starlink router in custom caravan, 4WD, and battery setups.
- Lightning precautions: In lightning-prone rural areas, use suitable earthing for metallic ground masts and consider an in-line surge protector. Disconnect antenna cables during severe electrical storms when it is safe to do so.
Frequently Asked Questions About Starlink Ground Adapters
Can I Mount a Starlink Dish Horizontally on a Ground Pole?
No. Mounting a motorised Starlink dish horizontally can stop the internal movement system from aligning correctly with the satellite network. On motorised models, this can trigger a 'Motors Stuck' error. On non-motorised models, such as Flat High Performance, the dish still needs the right tilt so water can run off instead of pooling on the face.
How Does the Gen 3 Adaptor Differ From the Flat High Performance Adaptor?
The Gen 3 adaptor is made for the UTA-232 kickstand-style terminal and suits smaller compatible masts. The Flat High Performance pipe adaptor is a heavier assembly designed to work with wedge-style hardware and larger pipe profiles.
Are Starlink Ground Pole Adaptors Windproof Against Severe Storms?
No Starlink ground setup should be treated as windproof in severe storm conditions. Precision-machined aluminium dish mounts offer strong rigidity for everyday use, but exposed ground poles still need sensible placement, secure footing, and tethering where wind load is a concern.
Ready to Choose the Right Ground Setup?
Choosing the right adaptor helps your Starlink setup stay stable, tidy, and reliable across Australian conditions. Start by confirming your dish model, measuring your mast's outside diameter, and checking the site with the Starlink app before you lock anything into place.
At SpaceTek Australia, we build robust Starlink mounts and accessories using folded aluminium and reinforced composite materials made for harsh outdoor environments. Explore our complete Gen 3 and V4 mounts and accessories collection to find a ground-friendly setup that suits your dish, pole, and property.

Leave a comment
This site is protected by hCaptcha and the hCaptcha Privacy Policy and Terms of Service apply.