
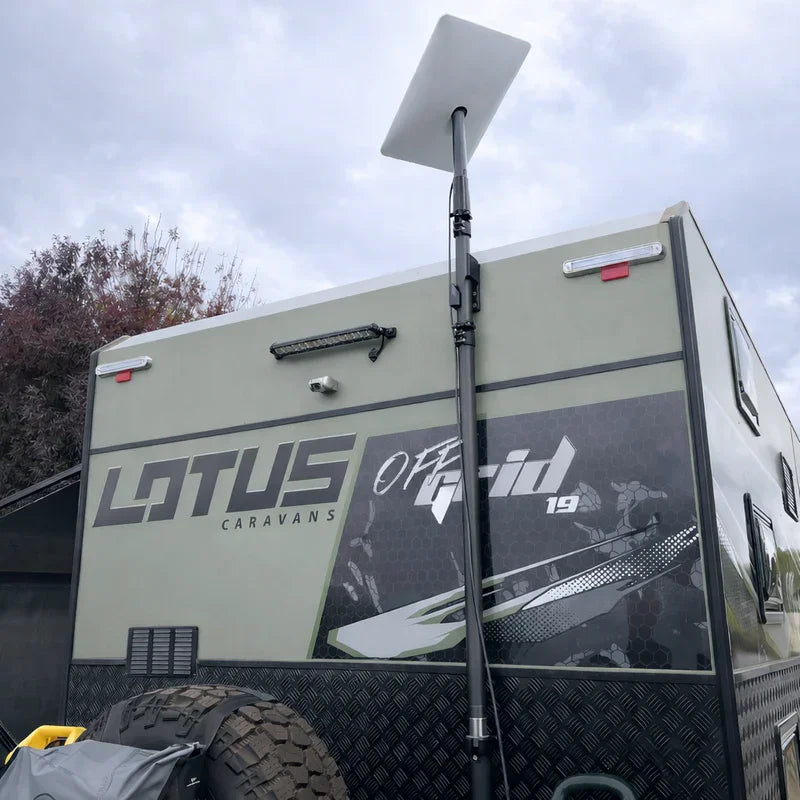
If you are taking Starlink on the road, the right caravan roof mount keeps the dish secure through highway travel, corrugations and harsh Australian weather. Choose a low-profile roof mount for permanent touring, a magnetic dish mount for flexibility between vehicles, or a telescopic pole when trees block the sky.
Key Takeaways
- Choose a dish mount that suits your caravan roof construction, travel style and Starlink hardware.
- A permanent low-profile mount is a practical choice for regular touring and rough roads.
- Magnetic dish mounts suit compatible steel surfaces when you want to move the dish between vehicles.
- A telescopic pole can help you clear tree cover when you are set up at camp.
- Explore RV Caravan Mounting Solutions to compare SpaceTek options for your setup.
Why Do You Need a Dedicated Roof Mount for Caravan Satellite Internet?
Touring Australia presents unique environmental challenges that domestic hardware simply cannot handle. Setting up camp in the red dirt of the outback or along breezy coastal headlands requires equipment built for punishment. When traversing corrugated tracks, standard consumer gear quickly rattles loose, and high-speed highway touring generates significant wind loads against your rig.
Caravan roofs also endure intense environmental stress. Radiant heat can push rooftop temperatures past 70°C in direct summer sun, baking any gear attached to your roof racks or composite panels. A dedicated, vehicle-specific mount safeguards your hardware against these harsh conditions. It delivers structural stability across thousands of kilometres of dirt tracks, manages thermal loads safely, and keeps your dish secured in severe weather.
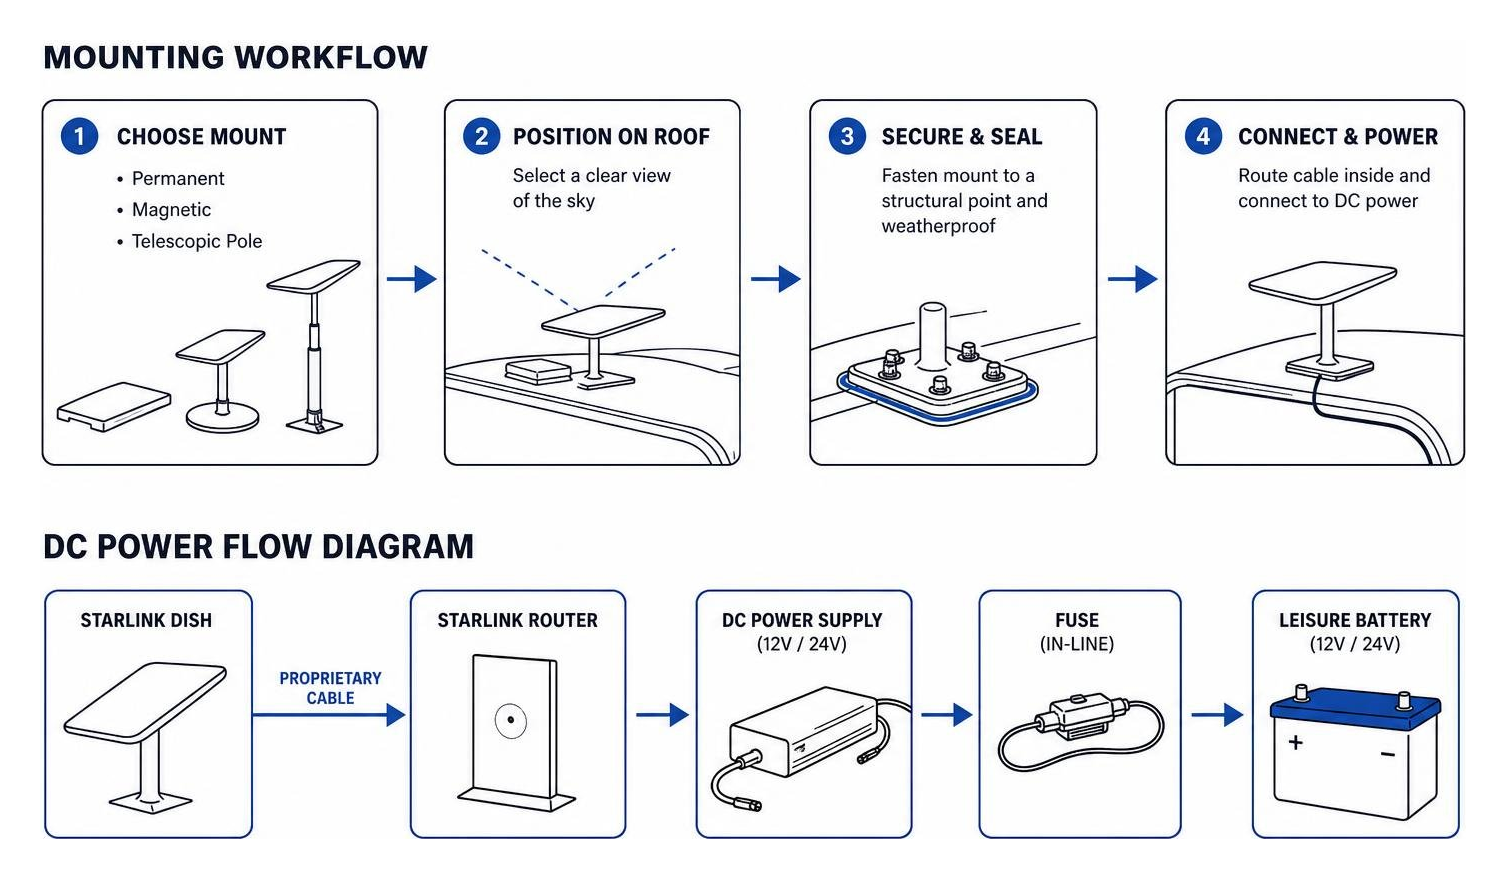
Which Starlink Roof Mount Options Suit Australian Caravan Touring?
The best Starlink mount for your caravan depends on how you travel, what your roof is made from and whether you need connectivity while driving. RV Caravan Mounting Solutions can help keep your hardware secure on rough tracks and at highway speeds.
| Mount Type | Best Suited For | Roof Compatibility | In-Motion Capable | Key Advantage |
|---|---|---|---|---|
| Permanent Flat Roof Mount | Full-time touring, off-grid expedition rigs | Flat composite, aluminium skin, roof racks | Yes | Set-and-forget, lowest aerodynamic drag |
| Heavy-Duty Magnetic Mount | Flexible touring, quick change between vehicles | Flat ferrous (steel) roof surfaces | Yes (rated setups) | Tool-free installation and removal |
| Carbon Fibre Telescopic Pole | Bush camping, heavily treed campsites | Drawbar, rear bumper, ladder mounts | No (Stationary only) | Elevates dish 1 m to 3 m to clear obstructions |
How Does a Permanent Starlink Roof Mount Perform Off-Grid?
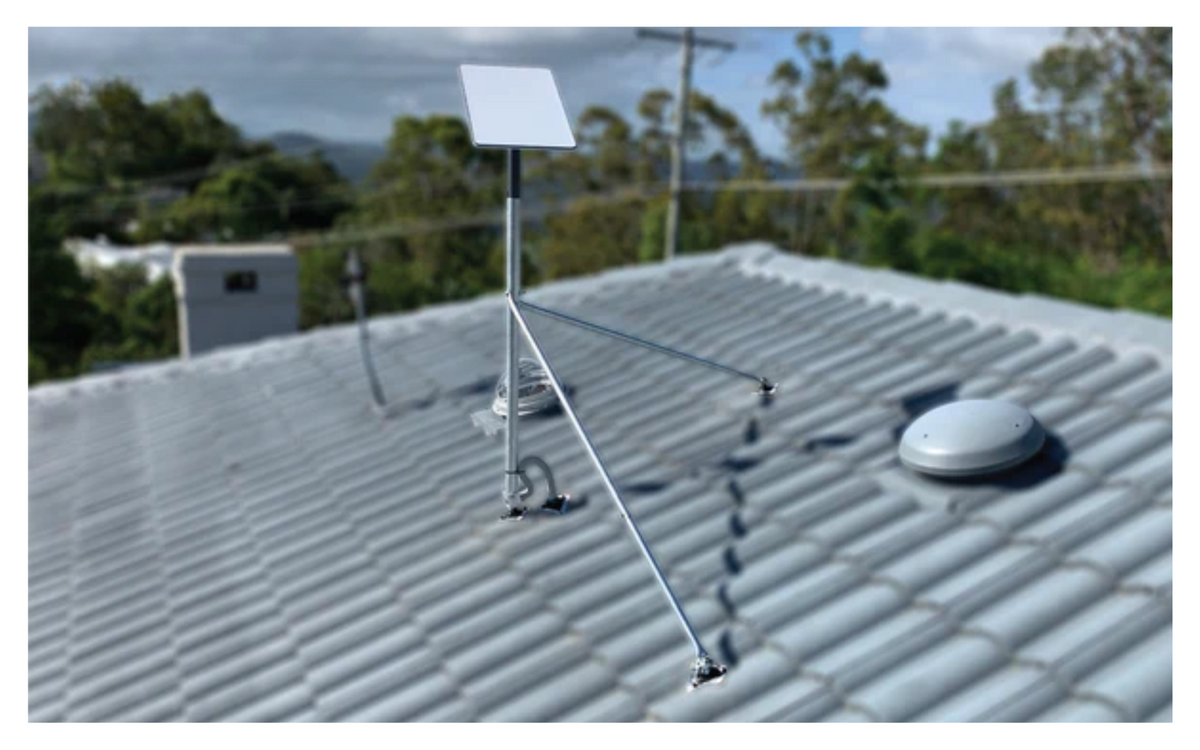
A permanent installation offers the ultimate hands-off experience for long-haul travellers. High-grade systems utilise precision-machined or folded aluminium housings secured to your roof structure, keeping the hardware low-profile and protected from low-hanging branches.
To guarantee true off-grid reliability, permanent systems rely on IP68-rated bulkhead sockets and robust entry glands. These seals lock out torrential rain, red dust, and fine sand. By mounting the terminal flat, aerodynamic drag is substantially reduced, and vibration across corrugations is distributed evenly across your caravan’s internal framing. You can follow our Step-by-Step Caravan Installation Guide to see how these low-profile systems are assembled, or explore our range of Starlink Mini mounts and kits for ultra-compact setups.
Are Heavy-Duty Magnetic Mounts Safe for Highway Speeds?
Magnetic mounts provide an exceptional blend of rock-solid holding power and flexible deployment. Our heavy-duty magnetic dish mounts use four oversized 87 mm earth magnets fitted with protective coatings to prevent paint scratching while maintaining immense pull force.
These mounts are engineered specifically for flat ferrous metal roofs, providing a no-drill alternative that easily withstands 110 km/h highway wind resistance. They allow you to shift the hardware between your caravan, 4WD canopy, or tow vehicle in seconds. When you store your caravan under a low carport, you can detach the dish quickly and stow it inside.
When Should You Choose a Carbon Fibre Telescopic Pole Mount?
Permanent flat mounts are unbeatable on open highways, but camping beneath dense eucalypts or steep valleys can obstruct satellite line-of-sight. This is where a carbon fibre telescopic pole mount becomes indispensable.
- Elevation Adjustment: Extends smoothly from approximately 1 m up to 3 m, easily raising your dish above caravan awnings, air conditioners, and low tree canopies.
- Ultralight Construction: Weighing only around 1.5 kg, it adds minimal weight to your setup while maintaining high structural rigidity.
- Versatile Mounting Locations: Easily fixes to caravan drawbars, rear bar assemblies, or toolboxes using corrosion-resistant 316 stainless steel fasteners.
- Pack-Down Convenience: Quickly collapses into a compact tube for safe storage inside your caravan tunnel boot during transit.
How Do Dish Models and Power Setups Change Your Mounting Requirements?
The physical dimensions, internal hardware, and power needs of satellite terminals vary considerably between models. Matching your dish mount to your specific hardware generation ensures aerodynamic stability, thermal safety, and peak electrical efficiency. If you are running the latest Standard hardware, you can check out our dedicated Gen 3 and V4 Mounting Hardware to match your terminal size.
How Do Dish Models Affect Your Starlink Roof Mount Caravan Selection?
- Starlink Mini: Features an integrated Wi-Fi router and an ultra-compact footprint. Its low profile makes it the premier choice for sleek, roof-mounted mobility setups that demand minimal wind resistance.
- Gen 2 Actuated Dish: Features an internal motor and curved back casing. Mounting this unit flat on a caravan roof typically requires removing the motor mechanism and installing the dish within a specialised low-profile vehicle housing.
- Gen 3 / V4 Standard Dish: A larger flat-panel design without internal motors. It offers excellent phased-array performance but requires a wider mounting footprint and robust perimeter support to handle high-speed wind loading.
Why Is Direct DC-to-DC Power Conversion Essential for Caravans?
Power management is critical when camping off-grid. Standard satellite setups rely on mains 240 V AC power, requiring you to run an inverter continuously. Running an inverter solely to power internet hardware introduces unnecessary conversion losses that steadily drain your leisure batteries.
Direct DC-to-DC power conversion provides a vastly superior alternative:
- Higher Efficiency and Lower Draw: Direct DC power supplies convert your leisure battery bank voltage directly to the required terminal voltage, eliminating the notable energy waste and idle draw of AC inverters.
- StarPower V2 and V3 DC Power Supplies: SpaceTek StarPower V2 and V3 DC power supplies deliver clean, stable power, ensuring maximum DC-to-DC efficiency and protecting your satellite hardware against voltage drops when caravan fridges or water pumps cycle on.
- Router Bypass Flexibility: Direct DC conversion lets you bypass power-hungry factory routers and integrate the dish directly into your caravan's existing 12 V network or custom Wi-Fi access points.
How Do You Properly Install and Weatherproof a Caravan Roof Mount?
A waterproof, rattle-proof installation requires careful planning. Installing a Starlink roof mount on your caravan should preserve the structural integrity of your roof while ensuring zero water ingress over years of outdoor exposure.
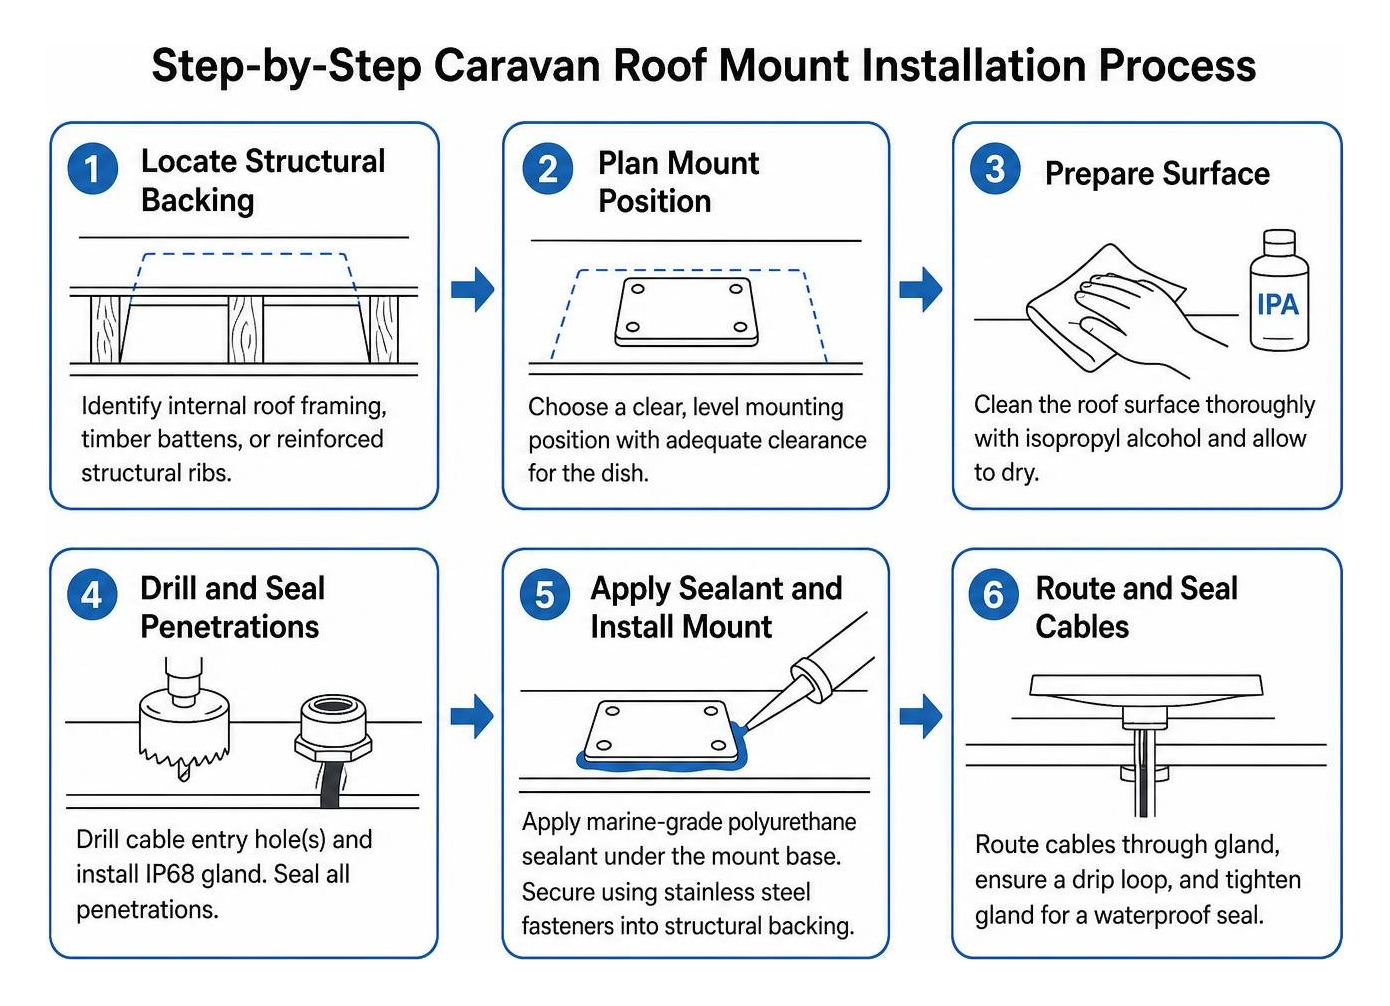
What Step-by-Step Installation Process Ensures Complete Weatherproofing?
Before you begin, gather the essential installation tools: a cordless drill with rated drill bits, a hole saw for cable penetrations, marine-grade polyurethane sealant, isopropyl alcohol cleaning wipes, and appropriate stainless steel fastening hardware. Once prepared, follow these sequential installation steps:
- Locate Structural Backing: Identify internal roof framing, timber battens, or reinforced structural ribs beneath the caravan roof skin rather than securing hardware solely into thin outer cladding.
- Dry Fit and Mark: Position the precision-machined aluminium dish mount on your roof, ensuring sufficient clearance from solar panels, air conditioning units, and roof hatches to prevent signal blockage.
- Clean and Prep Surfaces: Thoroughly clean all contact areas using isopropyl alcohol to eliminate wax, dirt, and road grime.
- Secure the Mounting Base: Apply high-grade marine adhesive-sealant under the mounting rails, align with structural supports, and secure firmly using rated corrosion-resistant fasteners.
- Install the Cable Entry Gland: Drill your cable access point, deburr the hole, route the wiring through an IP68-rated cable entry housing, and bed the gland flange in polyurethane sealant before fastening.
- Seal Connectors and Terminate: Secure all waterproof bulkhead sockets, connect your internal wiring, and verify all grommets are compressed correctly.
- Verify Electrical Polarity: Double-check all DC supply wiring with a multimeter to ensure correct voltage and polarity before connecting and powering on the dish.
What Critical Installation Mistakes Should You Avoid on Corrugated Roads?
- Fastening to Unsupported Thin Sheet Metal: Never rely solely on short self-tapping screws driven into thin aluminium or fibreglass caravan skin; constant road vibrations will cause the fasteners to fatigue and pull free.
- Choking Underside Airflow: Do not seal the underside of the dish directly against flat roof surfaces. Terminals require open ventilation channels beneath their casing to dissipate operating heat.
- Skipping Cable Strain Relief: Leaving loose cable loops on the roof allows highway winds to whip the wiring, eventually damaging internal plug pins and entry seals.
- Using Non-UV-Rated Sealants: Standard household silicone quickly degrades and cracks under harsh Australian UV rays; always use automotive or marine-grade polyurethane sealants.
Frequently Asked Questions About Caravan Starlink Roof Mounts
Can you use Starlink while driving a caravan?
Yes, provided you are using an appropriate in-motion capable service plan and a flat, securely engineered roof mount. Low-profile dish mounts keep the terminal aerodynamic, allowing the dish to maintain reliable high-speed connectivity at highway speeds of 110 km/h without shifting or catching wind.
How do you protect your Starlink dish from 70°C caravan roof heat?
Radiant heat bouncing off caravan roofs can push operating temperatures to extreme levels. SpaceTek aluminium dish mounts feature engineered ventilation channels that create a thermal barrier beneath the dish. Elevating the unit slightly allows ambient air to flow freely under the casing, carrying away heat and preventing thermal shutdowns.
What materials withstand harsh Australian UV and coastal conditions?
To prevent rapid corrosion and material breakdown, never use standard raw steel or non-UV-stabilised plastics. SpaceTek mounts are precision-machined or folded from marine-grade 5052 aluminium, treated with durable protective coatings, and assembled with 316 stainless steel hardware. This construction resists salt spray, red outback dust, and severe UV degradation over years of touring.
Which Starlink Mount Setup Suits Your Caravan Touring?
A well-chosen Starlink mount makes it easier to stay connected wherever your caravan takes you in Australia. A permanent low-profile roof mount suits regular touring, a magnetic option offers flexibility between compatible vehicles, and a carbon fibre telescopic pole can help when campsites have heavy tree cover.
SpaceTek Australia engineers robust, precision-machined and folded aluminium dish mounts, IP68 waterproof entry solutions, and ultra-efficient StarPower DC-to-DC converters built specifically for our punishing environment. Explore our complete range of touring mounts and power supplies to build an ultra-reliable satellite setup for your next lap of Australia. If you have questions about custom mounting or DC power integration, please Contact Our Technical Team for expert advice.

Leave a comment
This site is protected by hCaptcha and the hCaptcha Privacy Policy and Terms of Service apply.