Why Getting Fixed Mounting Solutions for Starlink Right the First Time Matters

The best fixed mounting solutions for Starlink are designed around four primary setups: Starlink Mini, Gen 2, Gen 3, and Caravan & RV.
Here is a quick breakdown to match your situation:
- Starlink Mini - Best for ultra-portable, light-use, or compact installations requiring a stable regulated DC input.
- Gen 2 - Ideal for standard residential homes needing motorised self-orientation and reliable vertical alignment.
- Gen 3 - Designed for high-performance residential or commercial setups requiring manual tilt and robust wind resistance.
- Caravan & RV - Engineered for mobile travellers needing low-profile, secure mounts that withstand highway speeds and rough terrain.
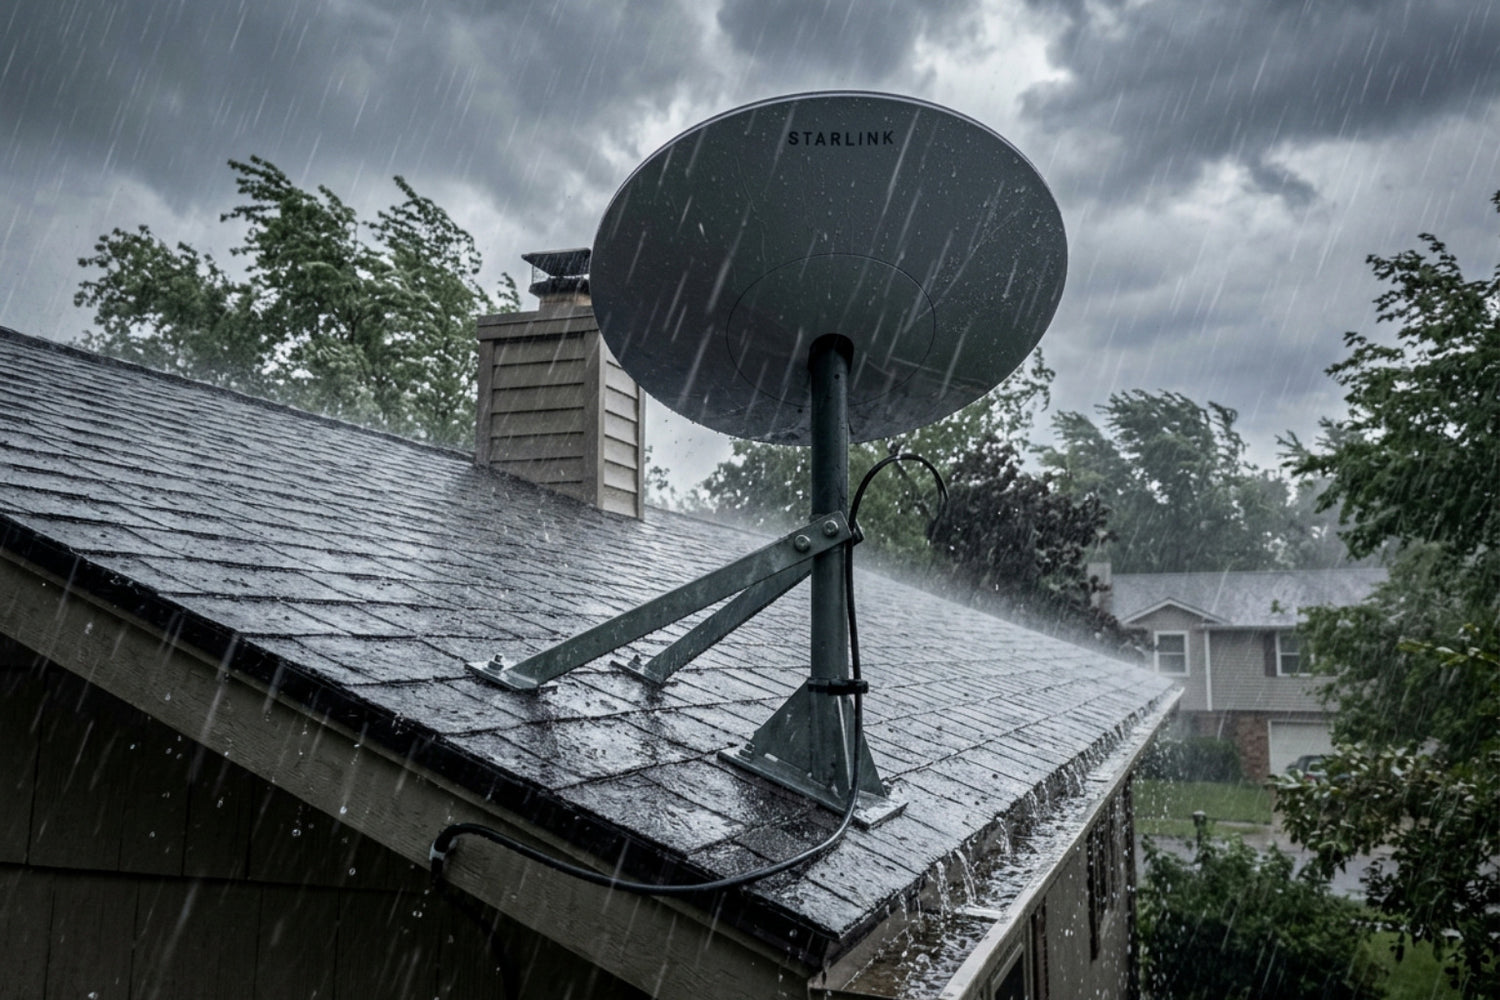
Your Starlink dish is only as reliable as what is holding it up.
Out in rural and regional Australia, that reality hits hard. Wind, dust, coastal salt spray, and intense UV do not care how good your internet plan is. If your dish is wobbling on a poorly rated mount, your connection will suffer — dropped video calls, buffering, and frustrating outages that have nothing to do with Starlink's satellite network.
The problem is not the dish. It is the hardware holding it in place.
Choosing the right fixed mount means matching your dish generation to the right mount type, surface, and material for your local conditions. Done properly, a quality fixed installation using premium SpaceTek Starlink mounts should be a set-and-forget solution for years.

Why Fixed Mounting Solutions for Starlink Matter for Signal Stability
Fixed mounting solutions for Starlink ensure your dish remains completely stationary, preventing signal misalignment and micro-outages caused by high winds or structural wobble. Phased-array antennas require absolute physical stability to track satellites moving rapidly overhead.
When your dish experiences even a few millimetres of wind-induced wobble, the beam alignment between your hardware and the satellite constellation can drop. This leads to micro-outages—brief interruptions that might go unnoticed during basic web browsing but will instantly drop a Zoom call, interrupt an online gaming session, or stall a live stream.
Australia's unpredictable weather demands a setup built for storm readiness. From intense summer storms in Queensland to howling winds across the Nullarbor, your mounting hardware must be engineered to withstand high wind loads. Cheap, generic setups simply cannot guarantee this level of stability. When you invest in high-quality, Australian-designed hardware, you are securing your signal against the elements. For a deeper look into why structural integrity is the foundation of high-speed satellite internet, check out our guide on how to Secure Your Signal Starlink Mounting Solutions Explained.
Types of Fixed Starlink Mounts and Their Applications
The best fixed Starlink mounts are engineered to match specific architectural structures, ensuring maximum structural integrity and weather resistance for your specific property layout. Selecting the right design prevents roof damage and ensures a clear line of sight to the southern sky.

Every property presents unique challenges, from roof pitches and building materials to surrounding foliage. Using a dedicated, professionally designed mount ensures your installation is physically secure and optimised for signal performance.
Starlink Mini Setups
The Starlink Mini is designed for ultra-portable and light-use applications. For permanent or semi-permanent installations, it requires a stable regulated DC input and a secure mounting system. SpaceTek offers precision-machined and folded aluminium SpaceTek Starlink Mini mounts that provide exceptional durability without relying on weak 3D-printed components. These mounts are ideal for small dwellings, sheds, or temporary structures where a compact footprint is essential.
Gen 2 Setups
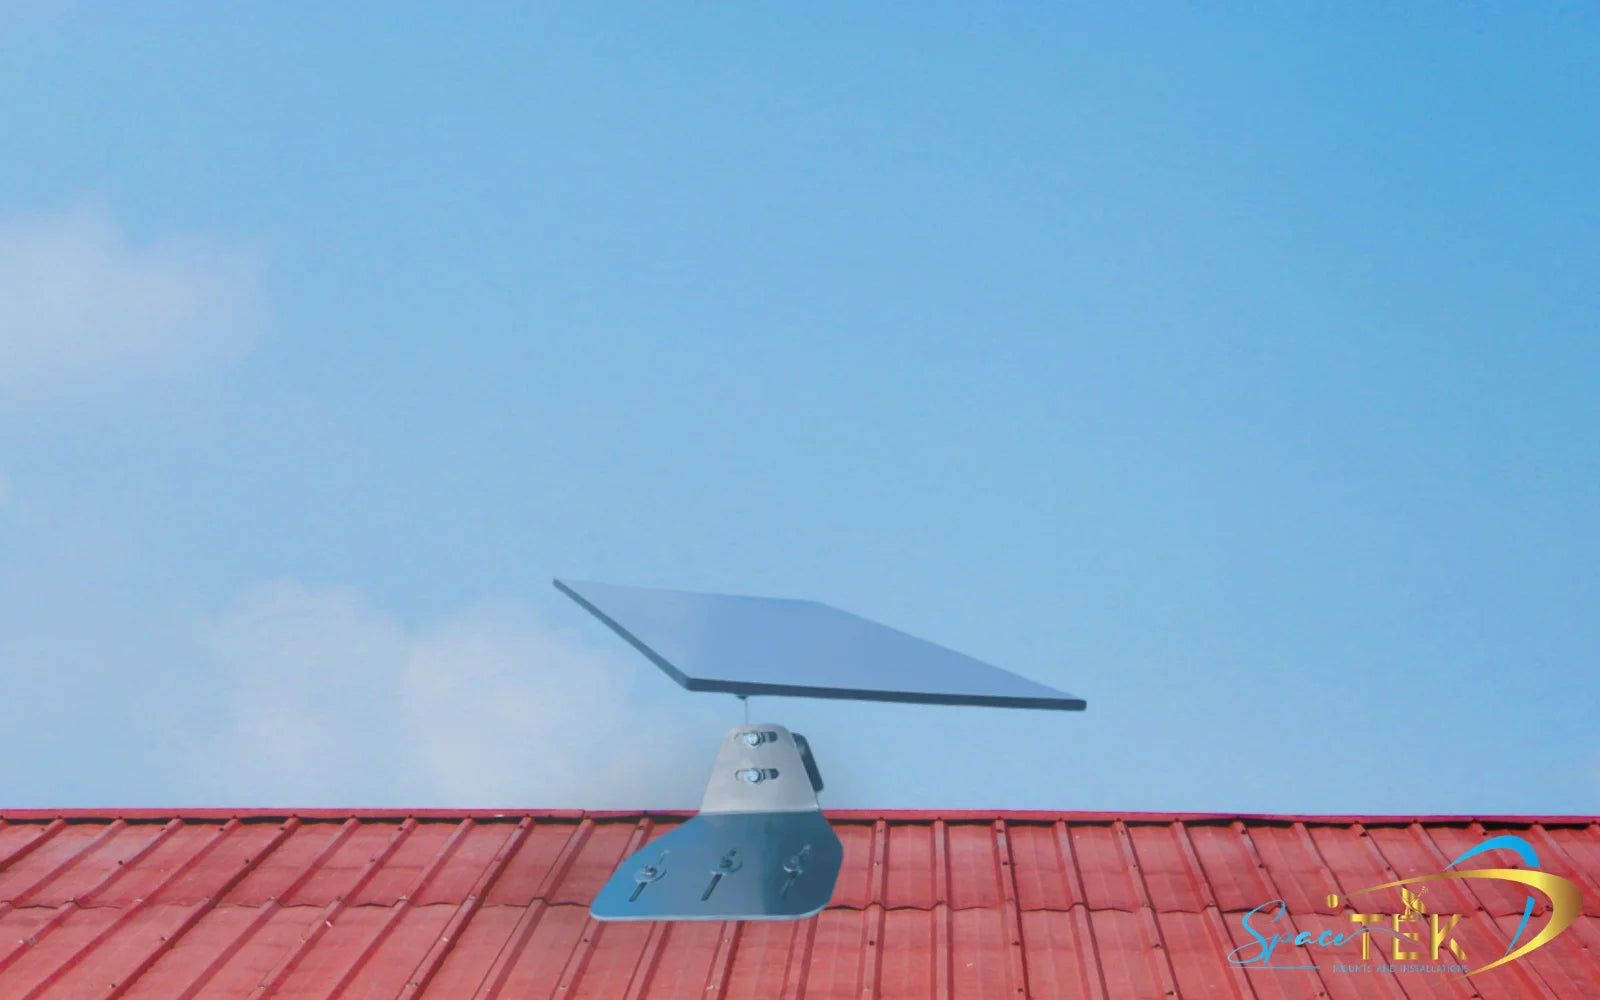
The Gen 2 Actuated dish is the standard residential choice for many Australian homes. Because it features internal motors, it must be mounted within 5 degrees of vertical to allow self-orientation. Using high-quality SpaceTek Gen 2 mounts ensures the dish remains perfectly stable during high winds, preventing micro-outages. These heavy-duty, folded aluminium mounts are designed to attach securely to metal roofs, gables, or existing poles using robust adapters, making them ideal for standard suburban and rural homes.
For metal roofs, which are incredibly common across Australia, specialised mounting hardware is required to prevent leaks and structural warping. To explore the best methods for securing your dish to various roof profiles, read through our Starlink Roof Mounts Complete Guide. If you are looking for a non-penetrating option, the official manufacturer's Starlink Ridgeline Mount Installation Guide outlines how to utilise weighted ballast systems safely. To understand how to plan and execute a high-clearance pole installation, refer to our comprehensive Starlink Pole Mounts Complete Guide.
Selecting the Right Mount by Dish Generation and Surface
Selecting the right Starlink mount requires matching your specific dish generation with a mount rated for your mounting surface and local wind conditions. Each generation has distinct physical dimensions, weights, and power requirements.

Gen 3 Setups
The Gen 3 Standard dish is a manual-pointing, wedge-shaped design that is slightly heavier and has a larger surface area than previous models, meaning it catches more wind. Because it lacks internal motors, it relies on a secure manual tilt to facilitate rain run-off and prevent water pooling on its face. For these installations, robust wind-rated hardware is non-negotiable. Our heavy-duty residential options in the SpaceTek Gen 3 V4 Mounts collection are crafted from premium folded and precision-machined aluminium, ensuring they never rust or degrade under the harsh Australian sun. For precise torque and alignment specifications, you can review the manufacturer's Performance Wall Mount Installation Guide.
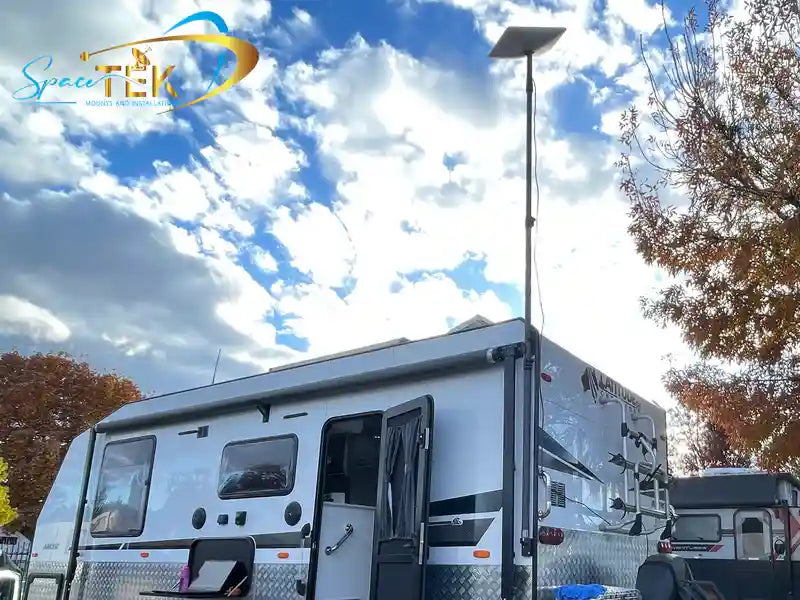
Caravan & RV Setups
For mobile travellers, caravan and RV setups require specialised mounting hardware to handle the vibration and wind shear of regional touring. Standard home mounts are not suitable for highway speeds. Our precision-engineered SpaceTek Caravan & RV mounts are made from folded and precision-machined aluminium, ensuring they never rust or degrade. These low-profile flat mounts keep the dish secure on roof racks, caravans, or vehicles, and they require a stable regulated DC input to protect the sensitive internal electronics from voltage drops common in dual-battery systems.
Step-by-Step Installation Standards and Weatherproofing
Professional installation standards for Starlink mounts require secure structural anchoring, a slight downward angle for drilling, high-grade silicone sealant for waterproofing, and meticulous cable routing to protect against UV and moisture damage.
To ensure your installation survives decades of harsh weather, follow these essential steps:
- Check for Obstructions: Use the official Starlink app to scan the sky from your proposed mounting location to ensure 100% clear sightlines.
- Locate Structural Timber: Never mount your dish directly to thin metal sheeting or roof tiles; always anchor into structural rafters or wall studs.
- Drill Pilot Holes Correctly: Drill your pilot holes at a slight downward angle. This simple trick prevents gravity from pulling water into the wall cavity.
- Apply Weatherproofing Sealant: Fill the pilot holes with premium neutral-cure silicone sealant, and apply sealant tape or silicone over the mounting plate before tightening your fasteners.
- Secure the Fasteners: Use high-quality stainless steel lag screws and tighten them firmly to ensure the mount cannot shift or vibrate over time.
- Route and Protect the Cable: Secure your Starlink cable every 30 to 45 cm using the provided UV-stabilized cable clips. Always include a "drip loop" before the cable enters the building to guide rainwater away from the entry point.
By taking the time to complete these steps correctly, you protect your home from water damage and protect your equipment from premature wear. For a detailed safety checklist, view The Ultimate Checklist for Installing Your Starlink Mount Safely.
Frequently Asked Questions About Starlink Mounts
Can I use the included X-frame base for a permanent install?
No, the included X-frame base is designed strictly for temporary, ground-level testing and is not safe for permanent roof or wall installations. It lacks the wind load ratings required to survive storms, and placing it on a roof without physical anchors risks severe damage to your dish, your home, and anyone below. Always use a dedicated, structurally anchored mount for permanent setups.
Will a third-party mount void my Starlink warranty?
Using a high-quality third-party mount will not void the Starlink warranty, provided the hardware utilises the factory-designed mounting points without altering the dish itself. However, DIY modifications that involve cutting, drilling, or gluing the plastic dish housing will void the warranty immediately. Utilising professionally engineered, slip-fit adapters and mounts keeps the warranty fully intact.
What is the best material for coastal installations?
For properties within five kilometres of the ocean, marine-grade aluminium and 316L stainless steel are the recommended materials to withstand highly corrosive salt spray. Standard zinc-plated steel or cheap alloys can rust within months, leading to structural failure. Selecting mounts made from rust-resistant folded and precision-machined aluminium ensures long-term durability in coastal environments.
Conclusion
When it comes to securing your high-speed satellite internet, the message is simple: do it properly the first time.
Investing in cheap, flimsy mounts or relying on temporary setups is a recipe for signal dropouts, structural damage, and eventual hardware failure. By choosing premium, Australian-designed fixed mounting solutions from SpaceTek, you are investing in peace of mind. Our SpaceTek Starlink mounts are constructed from high-grade folded and precision-machined aluminium, never 3D printed, and are specifically engineered to withstand the harshest coastal winds, outback heat, and torrential storms.
Whether you are setting up a permanent home system, customising an off-grid rural homestead, or preparing your mobile home for regional touring, we have a tailored solution for you. Explore our specialised SpaceTek Caravan & RV Collection for your mobile adventures, or upgrade your home setup with our robust SpaceTek Gen 2 Collection. Keep your connection rock-solid, no matter what the Australian weather throws your way.
Leave a comment
This site is protected by hCaptcha and the hCaptcha Privacy Policy and Terms of Service apply.