
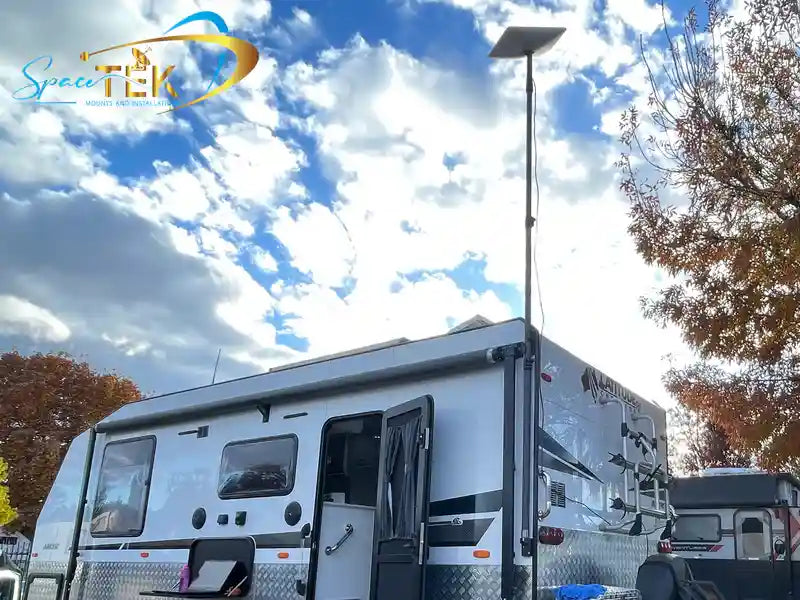
Why Your Starlink New Zealand Caravan Setup Changes Everything on the Road
To get the ultimate Starlink setup for caravans in New Zealand, you need to pair either a Starlink Mini or Standard Gen 3 dish with a flexible Roam plan, power it efficiently using a direct 12V DC-to-DC system to save battery, and secure it with a robust, New Zealand-made mount that can withstand corrugated outback roads. Getting these elements right means the difference between reliable broadband in the outback and a frustrating afternoon staring at a spinning loading screen. Here is a quick overview of what is involved:
- Choose your hardware: Starlink Mini or Standard Gen 3 dish
- Select a Roam plan: Roam 100GB or Roam Unlimited for travel across New Zealand
- Sort your power: 12V DC direct connection or 240V via inverter
- Mount the dish: roof mount, pole mount, or magnetic option with clear sky view
- Run your cables: use a weatherproof bulkhead entry point for permanent installs
- Configure via the Starlink app: check obstructions, set your Wi-Fi, and you are live
Not long ago, heading into remote New Zealand meant accepting one of two realities: no internet at all, or painfully slow satellite speeds that made even a basic email feel like a chore. Starlink has flipped that completely.
Powered by a constellation of low-Earth orbit satellites sitting just 550 kilometres above the ground, compared to 35,000 km for traditional satellites, Starlink delivers download speeds typically between 100 and 200 Mbps, even on outback dirt tracks. It now provides 100% coverage across New Zealand, from the Kimberley to the Nullarbor.
It is no surprise that nearly two-thirds of caravan and camping community members describe Starlink as a game changer they would not travel without. Whether you are a grey nomad doing the big lap, a remote worker needing a reliable connection mid-week, or a family wanting to stream movies at a bush camp, the technology genuinely delivers.
The challenge is not the satellite service itself. It is getting the hardware mounted securely, powered efficiently from a 12V system, and protected against New Zealand's brutal conditions: red dust, corrugated roads, coastal salt spray, and scorching UV. That is exactly what this guide covers.
Which Hardware and Plans Work Best for Kiwi Caravanners?
When you are planning a Starlink setup for a caravan in New Zealand, the first big decisions you will face are choosing the right physical dish and selecting a subscription plan that matches how you travel.
The hardware has evolved rapidly. While early adopters of satellite internet on the road had to store massive, power-hungry dishes in their caravan club lounges, today's options are incredibly streamlined. To get a complete picture of how the latest compact gear handles remote travel, you can read the Starlink Mini review: remote internet for overlanding.
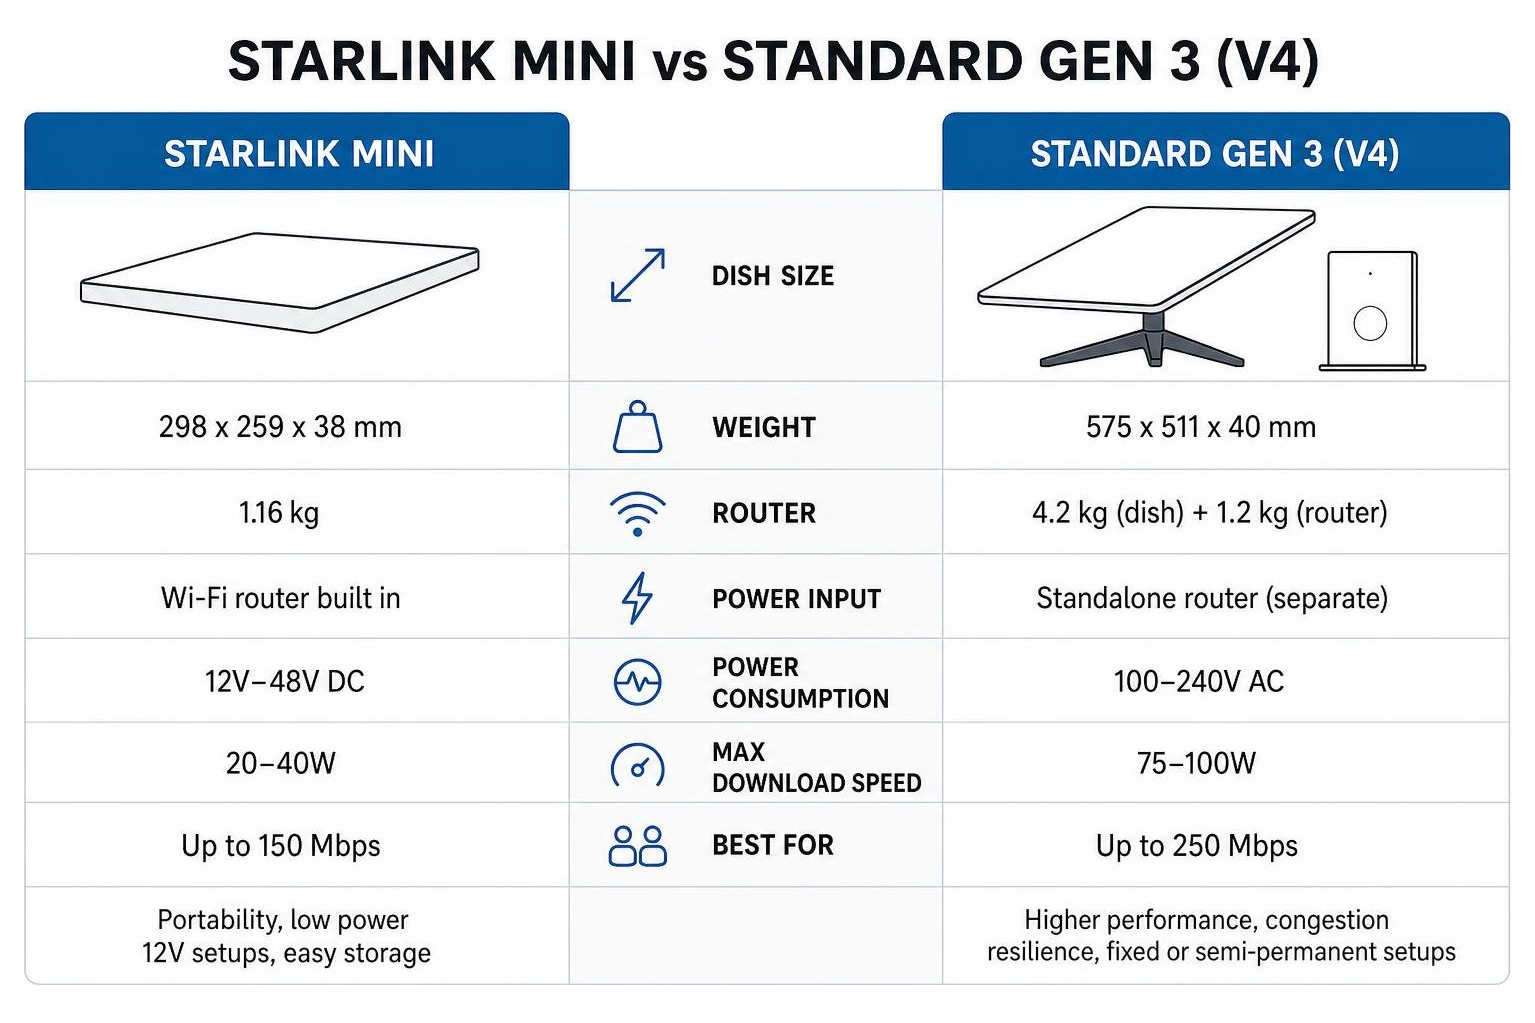
Starlink Mini vs Standard for Your Starlink New Zealand Caravan Setup
The two main choices for travellers in July 2026 are the Starlink Mini and the Standard Gen 3 (V4) dish.
The Starlink Mini is the absolute darling of the caravan community, and for good reason. It is roughly the size of a thick laptop and weighs just over one kilogram. Crucially, the Wi-Fi router is built directly into the dish itself, meaning you do not have a second bulky box to mount inside your caravan cupboard. It is highly portable, incredibly easy to pack away, and can be powered directly by 12V DC systems.
The Standard Gen 3 dish is physically larger, heavier, and relies on a separate standalone router. It does not have internal motors like the older Gen 2 models, which means you do not have to worry about moving parts wearing out from dusty outback tracks. The Gen 3 dish provides slightly higher maximum bandwidth and handles network congestion marginally better, but it demands significantly more physical space and power.
For a deeper dive into how these two units compare specifically for New Zealand caravan travel, check out our guide on Starlink RV New Zealand.
Choosing the Right Roam Plan for the Big Lap
Starlink offers specific plans designed for travellers. Unlike Residential plans, which are locked to a single home address, Roam plans allow you to access the satellite network anywhere in New Zealand.
- Roam 100GB: This plan is ideal for casual travellers, weekend campers, and those who primarily use the internet for navigation, emails, social media, and moderate streaming. If you exceed the monthly limit, the service continues at a reduced speed, which is still plenty for basic messaging and web browsing.
- Roam Unlimited: This is the go-to choice for full-time digital nomads, remote workers, and families who stream video content in high definition every single night. It provides unrestricted high-speed data across the entire continent.
One of the best features of the Roam service is the ability to pause and unpause your subscription. Billing is handled in monthly increments, so you can easily pause the service at the end of a trip and reactivate it right before your next adventure. If you are keeping your caravan parked in the driveway for a few months, you can drop down to Standby Mode, which keeps your account active at a minimal monthly cost without paying for full data.
For a comprehensive breakdown of service costs and data management, refer to the Starlink for caravans: plans and off-grid setup guide.
How to Power Your Starlink Off-Grid on 12V
One of the most overlooked aspects of a caravan setup is power management. When you are parked up at a free camp in the middle of the outback, every amp-hour matters.
Running your satellite system efficiently means looking closely at how it draws electricity from your house batteries. If you rely on standard mains power adapters, you will quickly find your battery storage depleted.

Direct DC-to-DC Power vs AC Inverters
The standard Starlink kit is designed to plug into a 240V wall socket. In a caravan, this means you have to run an AC inverter to convert your 12V battery power up to 240V, only for the Starlink power brick to convert it right back down to DC.
This double conversion is highly inefficient. A typical pure sine wave inverter wastes a notable portion of your power just keeping itself running. If you leave your inverter on 240V all day and night, you are throwing away valuable battery capacity on heat and conversion losses.
The solution is a direct DC-to-DC setup. By using our premium range of SpaceTek StarPower V2 and StarPower V3 DC power supplies, you can power your Starlink directly from your caravan’s 12V or 24V battery bank.
- DC-to-DC efficiency advantages: Bypassing the inverter altogether reduces power consumption significantly, keeping your system running cooler and longer by eliminating unnecessary conversion losses.
- Stable voltage: Long cable runs can cause voltage drop, which leads to random dropouts and searching errors on your dish. Our StarPower DC-to-DC systems feature integrated voltage boosters to ensure a stable, clean power supply reaches the dish, even through a 15-metre cable.
- Simplified wiring: It allows you to wire the system directly into a fused switch panel or a standard 12V outlet, bypassing the proprietary Starlink router completely if you want to run a custom low-power travel router.
Battery and Solar Sizing for Remote Travel
To run your system comfortably off-grid, you need to understand the electrical load.
- The Starlink Mini is exceptionally efficient, drawing minimal power once it has booted up and settled. During initial startup or when downloading critical firmware updates, it can peak briefly.
- The Standard Gen 3 dish is hungrier, pulling more power during active use, and climbing higher when the internal snow-melting heating elements activate, which you should disable in the app settings while in New Zealand.
If you are running a Starlink Mini on a direct DC setup for several hours a day, it will consume a modest amount of energy from a 12V lithium battery. This is incredibly easy to offset with a standard solar setup.
To prevent overnight battery sag and ensure your system stays online, we recommend a robust lithium battery paired with quality solar panels. If you are running the larger Standard Gen 3 dish, you should aim for a larger battery capacity and extra solar to cover the extra draw, especially on cloudy days. You can also use the "Sleep Mode" feature in the Starlink app to schedule the dish to power down during the night, preserving your batteries while you sleep.
What Are the Best Dish Mounts for Caravans and RVs?
When you are travelling down corrugated outback roads or parked in a wind-swept coastal campsite, how you secure your dish is absolutely critical. A flying satellite dish is not only an expensive accident but a massive safety hazard on public roads.
At SpaceTek New Zealand, we design and manufacture premium, heavy-duty dish mounts specifically for the harsh New Zealand environment. Unlike cheap, fragile 3D-printed alternatives that degrade rapidly under the harsh Kiwi sun, our Starlink mounts are precision-machined or folded from high-grade, rust-resistant aluminium and reinforced composites.

For a complete overview of what to look for when mounting your system, take a look at our Starlink mount for caravan, van or RV: complete installation guide 2026.
Roof Mounts, Pole Mounts, and Magnetic Options
There is no single "perfect" mounting solution; the best option depends entirely on how you travel and where you like to camp.
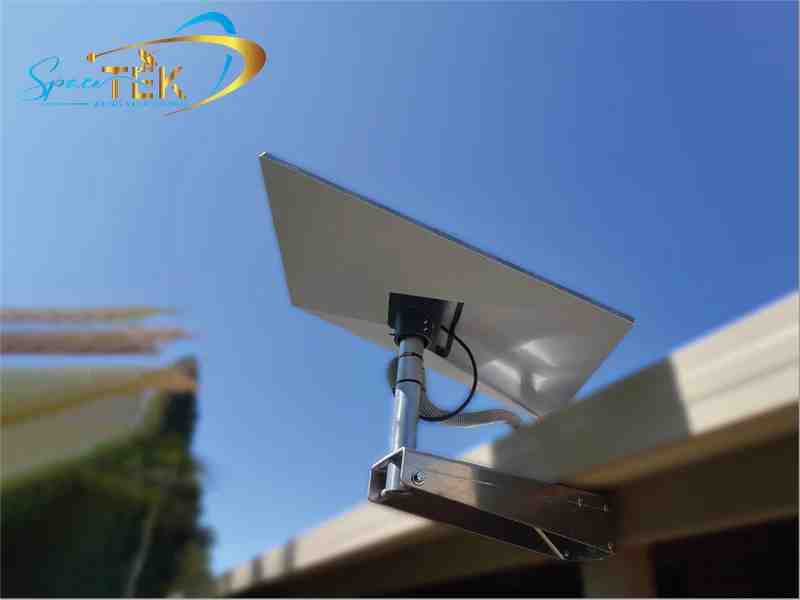
- Permanent roof mounts: Flat mounting your dish to the caravan roof is incredibly convenient. It means your internet is active the second you pull into camp with zero setup time. However, there is a major catch: trees are "Starlink kryptonite." If you park your caravan under a beautiful shade tree to keep cool, a roof-mounted dish will suffer constant dropouts.
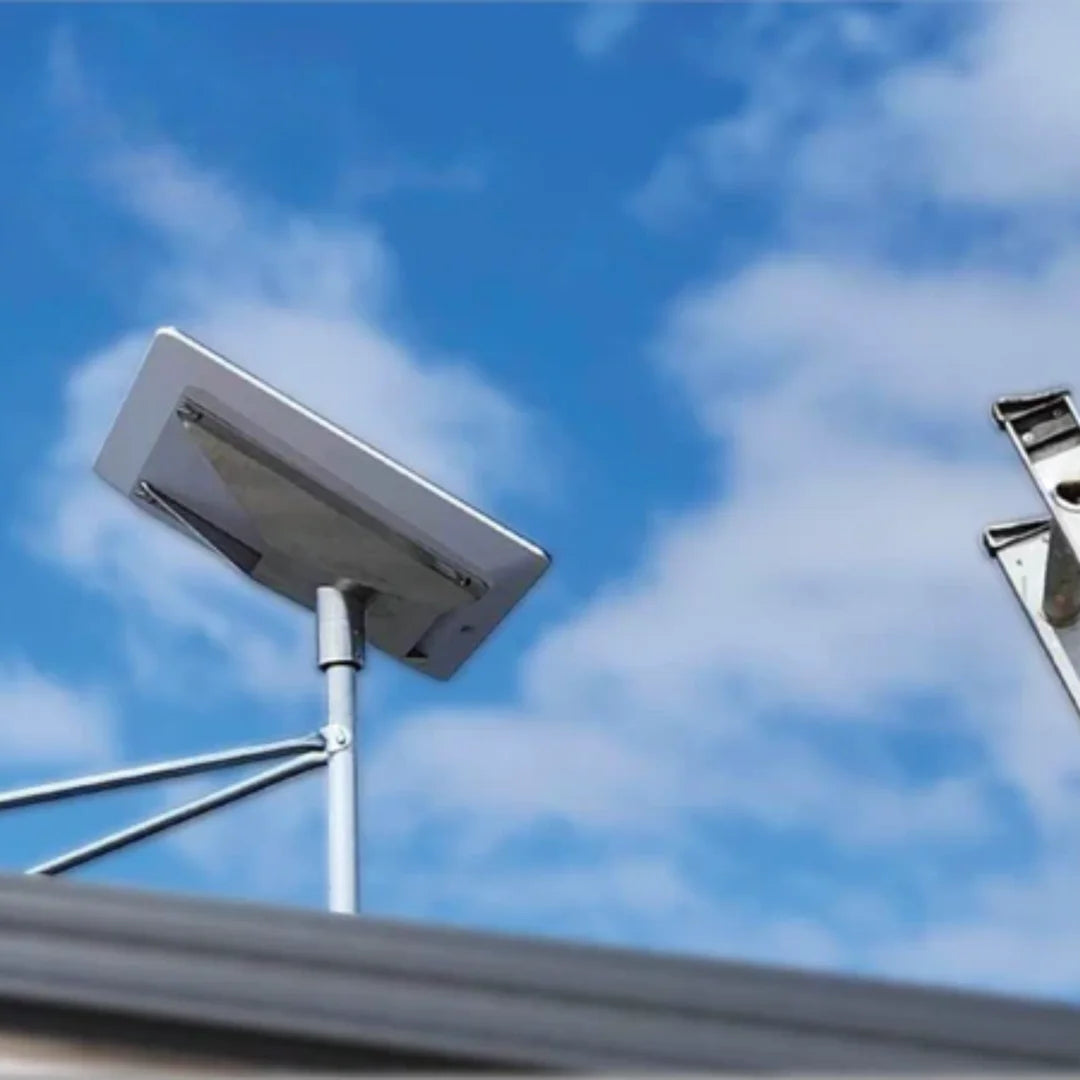
- Telescopic pole mounts: This is our top recommendation for regular travellers. By mounting a telescopic pole to your caravan’s drawbar, jockey wheel clamp, or rear bumper, you can elevate the dish high above the roofline to clear nearby obstructions. If you are parked under heavy tree cover, you can easily remove the pole and move the dish out into a clear patch of sky.
- Magnetic and suction mounts: Excellent for temporary setups or quick overnight stops. Heavy-duty magnetic Starlink mounts with high pull-force ratings can secure a Starlink Mini to your vehicle bonnet or roof rack, and they are even rated for highway speeds if you want to use the system in motion. Suction Starlink mounts work brilliantly on clean caravan fibreglass or glass surfaces, though they require regular maintenance checks in dusty outback conditions.
To find the right mount for your specific vehicle and travel style, explore our Ultimate Starlink Mini RV mounting guide.
Installing a Waterproof Bulkhead Cable Entry
One of the biggest mistakes caravanners make is running their Starlink cable through a window or jamming it through a main door seal. Not only does this pinch and damage the expensive shielded cable over time, but it also ruins your caravan’s weather seals, letting in dust, rain, and insects.
A professional, permanent setup requires a dedicated waterproof bulkhead cable entry point.
We recommend installing an IP68-rated waterproof bulkhead RJ45 socket connector on the side of your van. This allows you to plug your external dish cable directly into the outside of your caravan, passing the signal safely through the wall to your router inside.
Here is how to complete a clean, DIY-friendly installation:
- Choose the location: Select a convenient spot on your caravan wall, service hatch, or lower skirt panel. Ensure it is easy to reach from the outside and allows a short, tidy cable run to your router on the inside.
- Drill and clean: Mark the entry point and drill a hole matching the bulkhead body diameter. Carefully deburr the edges and clean the surrounding surface.
- Mount the bulkhead: Insert the IP68 connector from the outside, ensuring the supplied rubber weather seal is seated perfectly flat against the caravan wall. Secure it firmly from the inside using the lock ring.
- Connect internally: Run a short, high-quality shielded RJ45 patch cable from the back of the bulkhead connector directly to your Starlink router or DC power supply inside the caravan.
- Plug and play: When you arrive at camp, simply remove the waterproof dust cap from the exterior bulkhead, click your external Starlink cable in, and you are connected. When packing up, replace the dust cap to keep out fine red dust and moisture.
How to Complete Your Starlink New Zealand Caravan Setup
Once you have your hardware, power supply, and Starlink mounts sorted, it is time to put everything together and get online.
Step-by-Step Guide to Your Starlink New Zealand Caravan Setup
Setting up your system at a new campsite should only take a few minutes if you follow this simple routine:
- Check the sky: Before you unclip your dish, open the Starlink app on your phone and use the built-in "Check for Obstructions" tool. Point your phone camera at the sky to ensure you have a clear, wide-open view, paying close attention to the southern sky where New Zealand satellites are most prominent.
- Mount the dish: Secure your dish into your chosen Starlink mounts, whether that is raising it on a telescopic drawbar pole, placing it on a flat roof mount, or setting it up on its ground tripod away from the caravan.
- Route and connect cables: Plug your heavy-duty cable into the dish, ensuring the connection clicks securely. Run the cable back to your caravan, taking care to avoid high-traffic walking paths where people might trip, and plug it into your waterproof exterior bulkhead.
- Power up: Turn on your 12V direct DC switch or switch on your AC inverter. The dish will take a few minutes to boot up, search the sky, and automatically align its phased-array antennas with the passing satellite constellation.
- Connect to Wi-Fi: Open your phone's Wi-Fi settings, connect to your custom network, and enjoy high-speed broadband in the middle of nowhere.
Avoiding Common Obstructions and Setup Mistakes
To keep your connection running smoothly and protect your expensive gear, avoid these common caravan setup traps:
- Pinching cables: Never run cables through doors, windows, or slide-out seals. The internal copper wires are fragile, and pinching them will cause intermittent "No Signal" errors that are incredibly difficult to diagnose.
- Ignoring airflow: If you flat-mount your dish to your caravan roof, ensure there is a small air gap underneath. The dish can get quite warm during operation, and trapping heat underneath can lead to thermal throttling or automatic shutdowns in the middle of a hot New Zealand summer.
- Neglecting wind protection: Outback wind gusts can be incredibly violent. If you are using a portable ground tripod or a tall telescopic pole, always secure it with guy ropes, sandbags, or heavy-duty ground pegs to prevent the dish from being blown over and damaged.
- Forgetting to clean: Red dust, salt spray, and insect splatter will build up on the face of your dish over time. Give the face of the dish a gentle wipe down with a damp microfibre cloth occasionally to keep the signal clear. Never use harsh chemical cleaners or abrasive pads.
Frequently Asked Questions about Caravan Starlink Setups
Can I use Starlink while driving in New Zealand?
Yes, but with a few important conditions. In-motion use is fully supported on the Starlink Mini and the Flat High Performance dishes, provided you are on a compatible Roam or Mobile Priority plan. The standard Roam plans allow in-motion use at speeds up to 160 km/h.
To use your system safely while driving, you must use a secure, flat-mount system designed to handle highway wind resistance and road corrugations. Our SpaceTek Starlink Mini Mobility Mount is engineered specifically for this purpose, keeping your dish locked down flat to your roof rack or vehicle bonnet.
Does Starlink work under heavy tree cover?
No. Because Starlink relies on a direct line of sight to low-Earth orbit satellites moving quickly across the sky, even a few overhanging tree branches can cause frequent, annoying dropouts.
If you are camping in a heavily forested area, like New Zealand's high country or a lush coastal caravan park, you will need to use a portable setup. Carrying a long cable and a portable pole or tripod allows you to position the dish away from your caravan in a clear, open clearing.
How do I protect my Starlink dish and cables during travel?
Your satellite setup is a significant investment, and protecting it during transit is vital.
- Store safely: Never let the dish bounce around loose in the back of your 4WD or under the caravan bed. Use a dedicated padded carry bag or a hard transit case with custom-cut foam inserts to protect the face of the dish.
- Manage your cables: Avoid coiling your cables too tightly, which can kink the internal copper shielding. Use a loose figure-eight wrap or a dedicated cable reel to keep them tidy, and protect the delicate connector ends with soft dust caps when they are not plugged in.
Building a Reliable Caravan Starlink Setup for New Zealand Travel
Setting up a high-speed internet system in your caravan completely changes how you travel. It gives you the freedom to explore New Zealand's most remote, spectacular destinations without losing touch with family, missing work deadlines, or being cut off from real-time weather and safety alerts.
By choosing the right compact hardware, pairing it with a highly efficient 12V direct DC-to-DC power supply, and securing it with heavy-duty Starlink mounts, you will enjoy a reliable, hassle-free connection that is built to handle the toughest outback tracks.
If you are ready to upgrade your mobile setup with premium, rust-resistant dish mounts and efficient off-grid power accessories designed specifically for our harsh local conditions, explore our full range or get in touch with our expert team at SpaceTek Contact Us. Safe travels, and we will see you on the road!

Leave a comment
This site is protected by hCaptcha and the hCaptcha Privacy Policy and Terms of Service apply.